

Otitis externa and skin disorders in dogs are named as some of the most common issues presented to small animal, first opinion veterinary practices in the UK (O'Neill et al. 2021). Paterson (2020) states that ear cytology is one of the most important steps in investigating otitis externa. For this reason, it is important that nurses are confident in the process of examining ears, taking samples for diagnostic testing, and preparing slides for examination under the microscope. This guide assumes that a thorough history has already been taken from the owner and that a full health check has been carried out of the rest of the patient's body.
Preparation
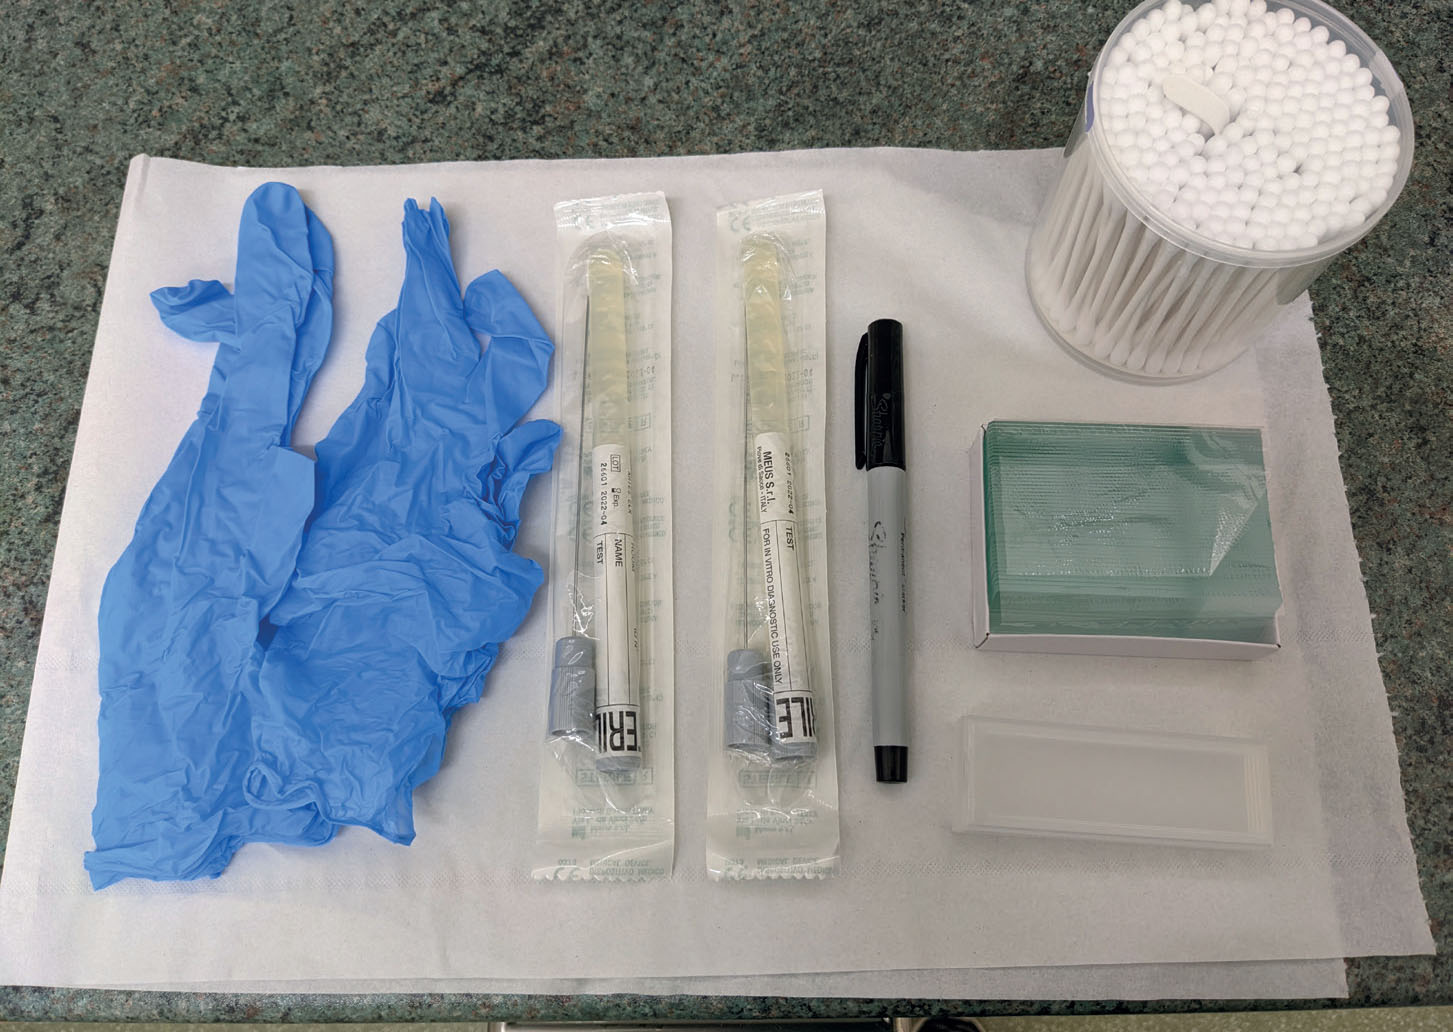
It is important to have all the equipment to hand before beginning the examination. This includes:
- Examination gloves
- Otoscope and a range of suitable sizes of specula
- Clean cotton buds
- Charcoal/transport medium swabs for culture and sensitivity testing
- Microscope slides (ideally with a frosted edge for ease of labelling)
- Suitable treats for the patient (taking allergies and medical conditions into account)
- An assistant to help restrain the patient
- Muzzle if required
- Microscope (with at least up to 100x oil lens)
- Immersion oil
- Pencil for labelling the slides
- Diff-Quik stains and extra gloves to use when staining.
Figure 1 shows the equipment that should be prepared before the examination and sampling begins. Ensure all equipment is in good working order (e.g. the bulb of otoscope is working), and that the equipment is clean. Specula must be cleaned and disinfected thoroughly between patients, and you should use a separate, clean speculum (these can and should be disinfected between patients) for each ear to prevent cross contamination.
Ear examination
The first element of examination is to watch the patient from a distance. Behavioural signs of ear issues can include:
- Holding their head to one side
- Rubbing ears against owner or surfaces
- Holding ears at a different angle
- Scratching at their head
- Shaking their head
- Groaning or vocalising when their ear is touched.
It is important to be aware that most dogs will find examination of their ears unpleasant, particularly if they have a potentially painful problem. It is important to assess the temperament of the patient by asking the owner and reviewing previous medical records to see if any aggression or nervous behaviours have been shown in previous examinations. You should always seek assistance from a trained colleague to restrain the patient and use appropriate safety equipment such as muzzles if deemed necessary. Utilise treats and soothing voices to make the process as pleasant for them as possible. Ask the suitably trained assistant to stand or kneel on the opposite side of the patient to the ear you are examining. They should place one hand at the back of the head and one under the muzzle to try and keep the head from moving during the examination.
If you already know which ear is likely to be most affected or painful, from observation or owner history, you should start by examining the least affected side. Gently lift the pinnae (external ear flap) and examine for signs of injury, redness, hair loss, swelling, bleeding or discharge. Gently palpate the ear canal externally to see if this elicits any pain reaction from your patient. If it elicits a strong response, consider if it is ethical or safe to continue to an internal examination. Refer to your veterinary surgeon if you believe the dog to be too painful or aggressive to examine fully. The veterinary surgeon may wish to sedate the patient, with the owners consent, or use a course of analgesic medication to take home and return for a re-examination when the ear is more comfortable.
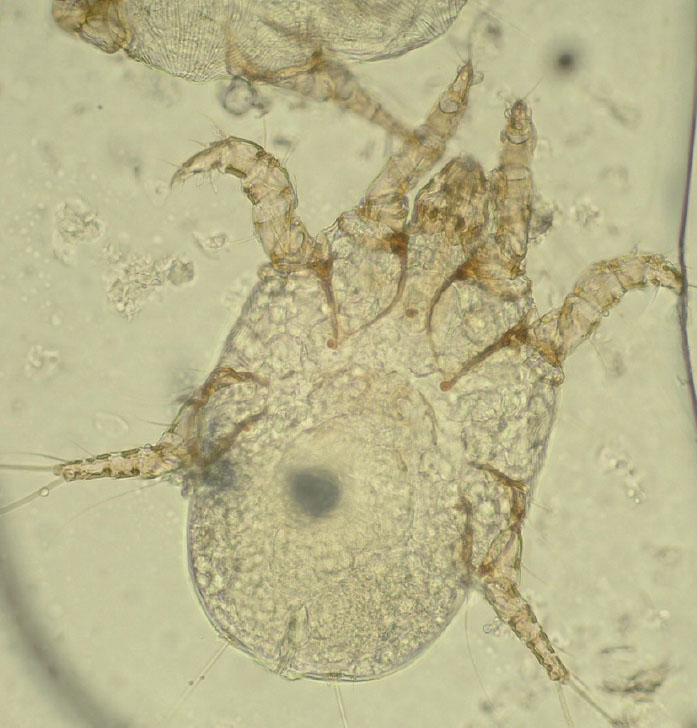
If there is no strong pain response you can begin to look at the ear canal in more depth — begin by looking at the opening of the canal (Figure 2). Make note of any injuries, cerumen (ear wax), reddening, swelling, or narrowing. It may be possible to see parasites such as ticks in these areas, and ear mites are just visible to the naked eye.

To examine the internal ear canal, you will need an otoscope. Choose an appropriately sized speculum and turn the bulb on. The speculum choice should be small enough to comfortably fit down the ear canal, but large enough to get a good view. Hold the pinnae up with your non-dominant hand and observe the tip of the speculum as you insert it gently into the top of the ear canal, then look down the otoscope as you advance it slowly. You will first be advancing down the vertical canal — be careful as you insert the tip that you do not push on the anthelix, a sensitive piece of cartilage at the top of the opening to the vertical ear canal, as this could be painful for the patient. As you slowly advance the otoscope continue to look for parasites, foreign material (such as grass seeds), and the general appearance of the skin. Take care not to push the speculum against the skin surface of the ear canal, as this will be uncomfortable for the patient. You will soon reach the horizontal ear canal, where you will need to adjust the angle of your otoscope so that it is parallel to the floor (if your patient is standing) or at a 90o angle to the skull. At the end of the horizontal canal, unless the ear canal is particularly inflamed, or full of cerumen, you should be able to visualise the tympanic membrane (ear drum). It is important for the veterinary surgeon's treatment plan to know if this is ruptured or intact. If it is suspected that the tympanic membrane is ruptured, the veterinary surgeon must be consulted to confirm a diagnosis.
Once the examination is complete, ensure you remove the speculum head and place it in an appropriate place to be cleaned before its next use. Always use a clean, unused speculum for the second ear, and repeat the same procedure to examine the second ear.
Taking a sample
Hold the pinnae up with your non-dominant hand, and with the other gently insert the tip of the cotton swab into the top of the ear canal and slowly rotate. It is advisable to take a charcoal or swab with transport medium before any treatment, even if this is to be kept on hold, as a full culture and sensitivity may be required depending on what is found on examination or how the patient responds to initial treatments. Ensure any samples are clearly labelled with the patient's name, date of sampling and which ear the sample is taken from. Repeat the same process with a clean cotton bud and then gently roll the sample onto a microscope slide. Only roll over an area of the slide once (do not overlap your rolls as this may make the sample too thick on the slide and harder to examine). It is sensible to take more samples than needed for in-house microscopy, as unstained slides may be required to be sent to an external laboratory.
Microscope slide preparation
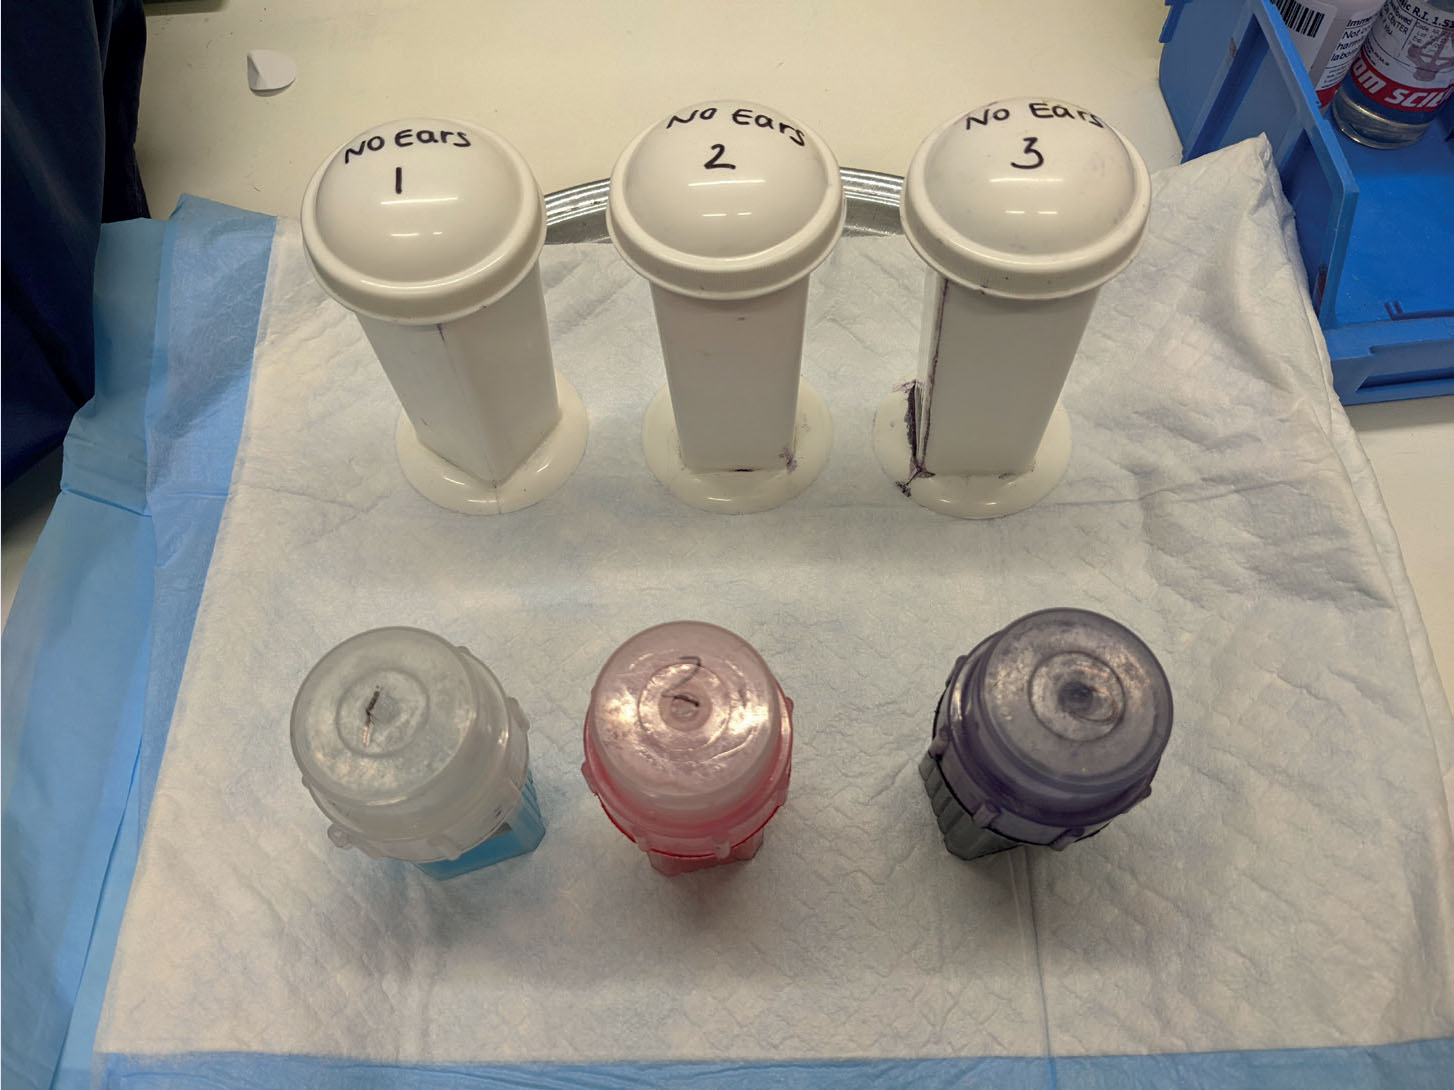
Once the samples are on the slides, examine them under the microscope (unstained) initially for parasites. Otodectes spp. (ear mites) are the most common parasite to find on these samples (Papajeski, 2020) (Figure 3), but there may also be fleas and other species of mite. Once a parasite check has been done stain the slides with a Romanowsky stain such as Diff-Quik. Ideally the practice laboratory should have separate Diff-Quik solutions for ear swabs and other sample areas (such as blood smears) to prevent cross-contamination of samples (Figure 4). Dechra (2016) recommended that solutions are changed regularly as microorganisms can grow in stain solutions, which can cause artificial bacteria overgrowth on slides. How often this is done will vary depending on how often they are used, but changes should be documented and every other week as a minimum is best practice. Stain pots should have tight fitting lids that stay on when the stains are not in use. Gloves must be worn to prevent staining of skin and to comply with health and safety protocols, as Diff-Quik stains are classed as hazardous. Wearing gloves also prevents cross-contamination of the slide (Avantik, 2009).
Staining the slide:
- The first solution is the fixative agent (light blue) — dip the microscope slide in this solution five times, holding it in for one full second each time
- Repeat the same process in the eosinophilic (red solution), and finally the basophilic (dark purple solution)
- Do not rinse the slide between each stain, but tap the slide against each pot and dab with clean paper towel to remove any excess stain between each solution
- Once the staining is finished, use distilled water to rinse the slide over a sink or dish until the water runs clear
- The slide should then be left to dry, or a hair dryer can be used on a low setting to speed up the drying process. The slides should then be ready for microscopic examination.
KEY POINTS
- All equipment should be prepared and checked before beginning the examination.
- A clean, disinfected specula should be used for each ear individually to prevent cross contamination.
- Internal ear examinations may not be possible in some cases without a veterinary surgeon prescribing analgesia or arranging sedation with the owner's consent.
- It is always useful to take swabs to be kept in a transport medium at first examination before any further treatment in case culture and sensitivity is indicated.
Conclusions
Registered veterinary nurses are invaluable in supporting veterinary surgeons in their diagnosis of ear disease in dogs. Confidence in the technique of examining, taking and preparing samples is key to providing the best possible assistance in these cases.