

The blood smear is a thin layer of blood smeared on a microscope slide which is a simple but highly informative haematological tool in the screening, diagnosis and monitoring of disease progression (Adewoyin and Nwogoh, 2014).
Significant advances in technology and the advent of sophisticated automated haematology analysers both in-house (e.g. IDEXX LaserCyte Dx) and diagnostic laboratories have not eliminated the need for microscopic evaluation of a well prepared, well stained peripheral blood smear which still forms the cornerstone of diagnostic veterinary haematology. Examination of a diagnostic blood smear by a skilled laboratory technician is an invaluable tool (Park and Shafer, 2014) and often yields significant information regarding the health and diagnosis of a patient that would otherwise be missed. In the authors' experience, it is not uncommon for an unhealthy patient to have automated haematology values which fall within the reference intervals, and yet have significant pathology obvious on evaluation of a blood smear.
In spite of certain analysers (e.g. ADVIA® 2120i (Siemens Healthcare Diagnostics AB)) now being equipped with species-specific software, quantitative values from haematology analysers should always be confirmed using a blood smear as the instruments are generally insensitive to correctly identifying cell morphology, intracellular inclusions, infectious agents, platelet clumping and atypical or immature cells (Heinrich and Sharkey, 2015). For example, Lilliehöök and Tvedten (2011) identified that the ADVIA® 2120i (Siemens Healthcare Diagnostics AB) was unable to accurately identify canine and feline basophils.
Despite the majority of veterinary practices being equipped with even basic haematology analysers, producing and evaluating a quality diagnostic blood smear is often considered a lost art, resulting in many submitting samples to a referral diagnostic laboratory for analysis. The delay between sampling and analysis at a referral laboratory often results in age-related changes occurring such as red blood cell swelling, platelet activation and altered morphology (Furlanello et al, 2006). Therefore, it is imperative clinicians and nurses are comfortable in routinely producing fresh blood smears of diagnostic quality when submitting samples to external laboratories to obtain maximal information regarding the health of the patient.
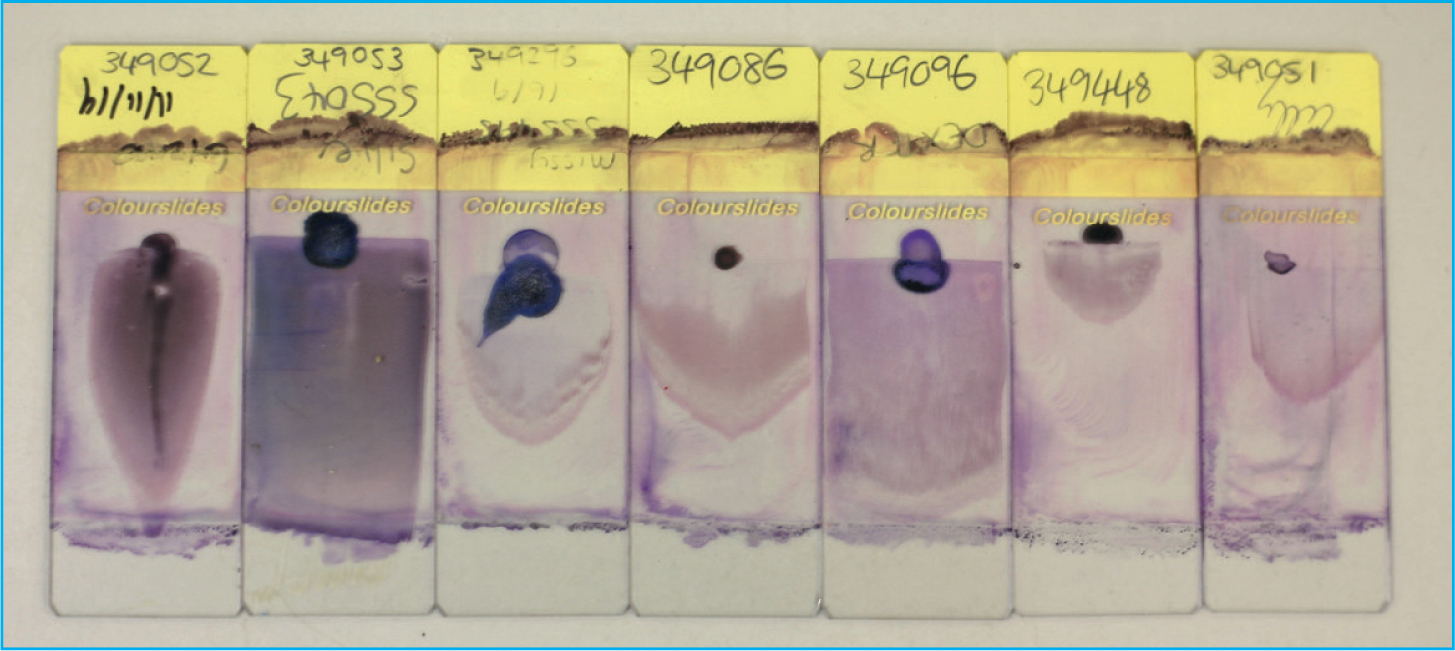
All too often a blood smear is submitted alongside a blood sample, but it is not of sufficient quality to yield results of clinical significance (Figure 1). A blood smear of diagnostic quality is described as having a complete feathered edge, free from streaks, used for the analysis of platelet clumping and large unexpected cells (e.g. neoplastic cells, macrophages, mast cells, and megakaryocytes) and a uniform, intact monolayer (thin area of red blood cells used to evaluate cell morphology and perform a manual white blood cell differential).
Producing diagnostic quality blood smears is a technical skill frequently open to error through lack of practice (Sirois, 2017). This article will focus on providing best practice guidelines to producing a diagnostic blood smear, with consideration for common errors via outlining troubleshooting ideas.
Production of diagnostic quality blood smears
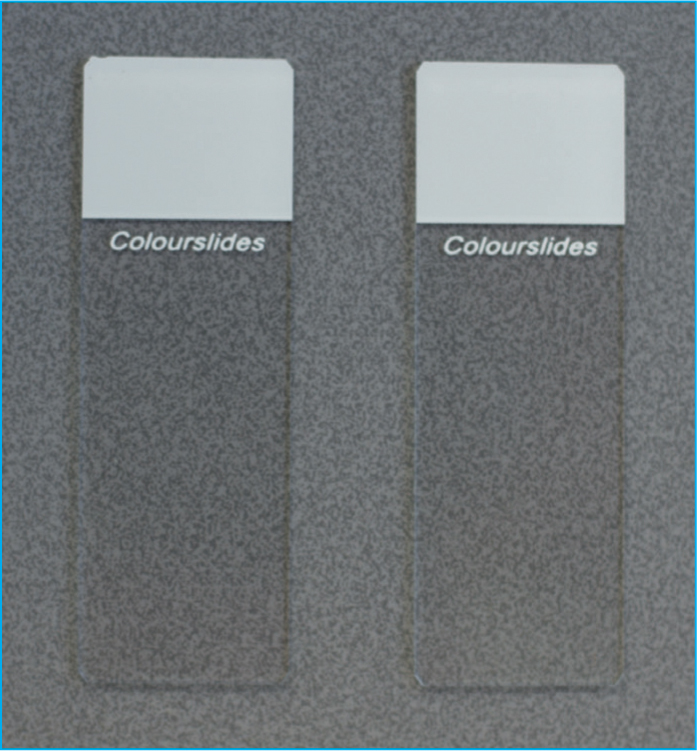
Preparation begins with the selection of appropriate microscope slides which should be premium, pre-cleaned slides, frosted at one end to adequately label the smear with the patient's details (Figure 2). Place two to three slides on a clean dry flat surface, ensuring you only touch the microscope slides by the edges to avoid grease from fingertips which will ultimately produce streaks on the finished smear. Select a final slide to use as a spreader slide, this should ideally be a clean fresh slide to eliminate the possibility of dust or dirt on the slide edge which will produce artefacts on the finished smear. Potassium ethylenediaminetetraacetic acid (EDTA) is typically the anticoagulant of choice for routine haematology in the majority of mammalian species (Goossens et al, 1991). Other anticoagulants such as lithium heparin are commonly used for small mammals and exotics (e.g. reptiles and birds) as EDTA has been noted to cause haemolysis when mixed with blood from certain species of birds (e.g. crows, ravens) and reptiles (Campbell and Ellis, 2015).
During sample collection, a quick and clean blood draw by an experienced individual is required to avoid post-sampling complications such as platelet activation or in vitro haemolysis inside the sample tube, resulting in an undiagnostic sample (Favaloro et al, 2012). A partially clotted sample can lead to a misdiagnosis of a thrombocytopenia, especially in cats (Norman et al, 2001).
Once the blood sample has been collected in the syringe, the sample should be careful dispensed into the appropriate tube ensuring the sample tube is properly filled to the line, and then the tube should be inverted 3–6 times to ensure the blood is properly mixed with anticoagulant (Favaloro et al, 2012). A fresh blood smear should be produced within 2 hours — delayed preparation of smears can result in in vitro degeneration of cellular morphology (e.g. cell swelling and artefactual toxic change in neutrophils) — and be checked for platelet clumps and microclots on smear as these can result in a pseudothrombocytopenia (Bain, 2005).
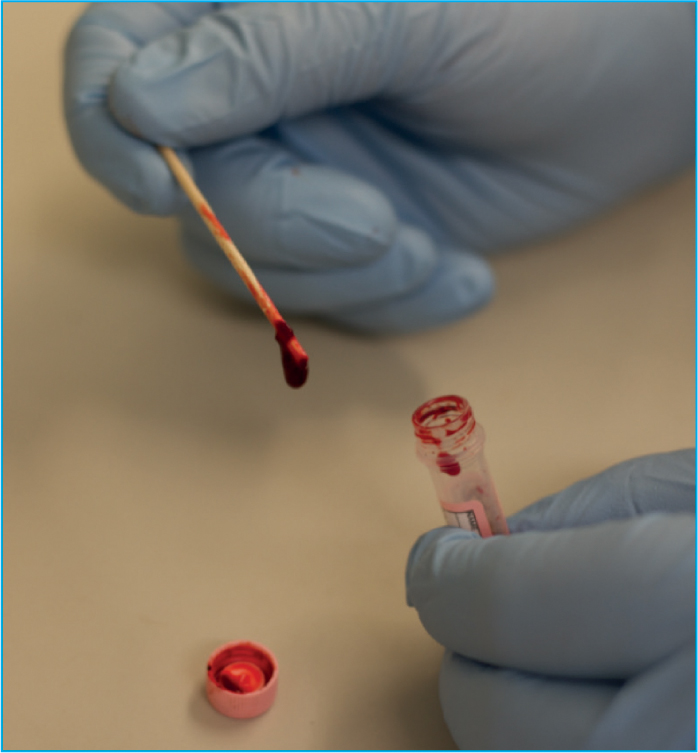
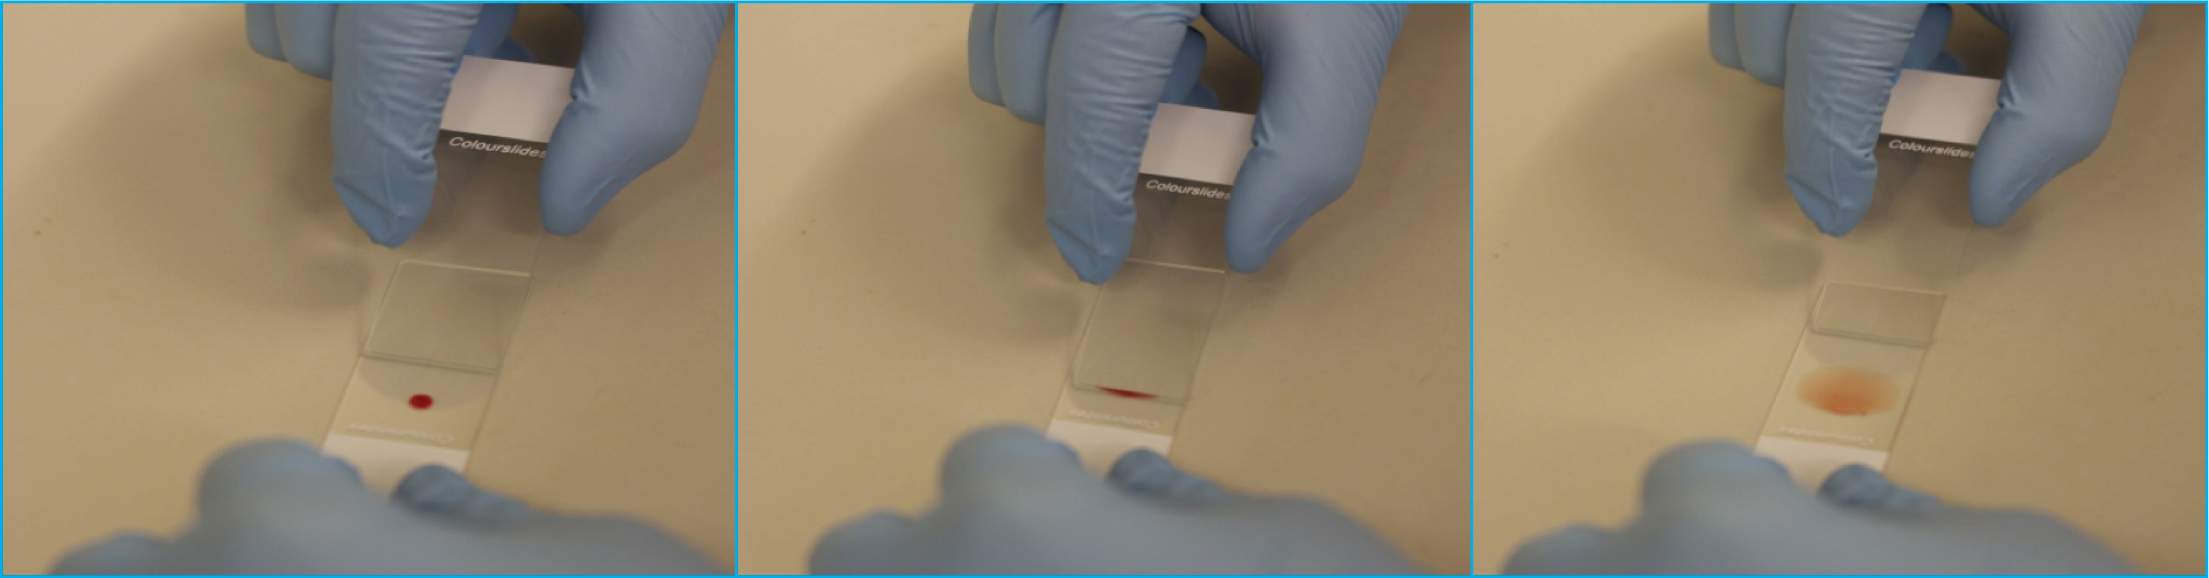
Prior to making a blood smear, the sample tube should be thoroughly mixed, by inverting the tube a minimum of 10 times, but never shaken (Adegoyin and Nwogoh, 2014). This mixing will ensure the blood cells that settled out, have been re-disbursed throughout the sample and that a representative uniform fresh blood smear is achieved (Thrall, 2012). Once well mixed, the sample should also be examined for the presence of blood clots within the tube by gently using a wooden applicator stick around the edge of the blood tube. If a clot is present, it should adhere to the wooden stick (Figure 3), and a new sample should be obtained as a clotted sample is inadequate for enumeration of blood cells as the numbers will be falsely decreased.
When making a blood smear, there are three main aspects the user needs to control: the size of the blood drop, the angle of the spreader slide and the speed at which the spreader slide moves away from the blood droplet (Harvey, 2012). These three factors must be adjusted adequately by the user to ensure a quality, consistent diagnostic blood smear is made each time (Figure 4). For anaemic (haemodiluted) samples, a smaller volume of blood, a greater angle of spreader slide (>45°) and a faster speed is required as the blood will spread much faster; whereas for thick (haemoconcentrated) samples, the inverse is true, a larger volume of blood is required, with a lesser angle of spreader slide (<45°) and a slower speed.
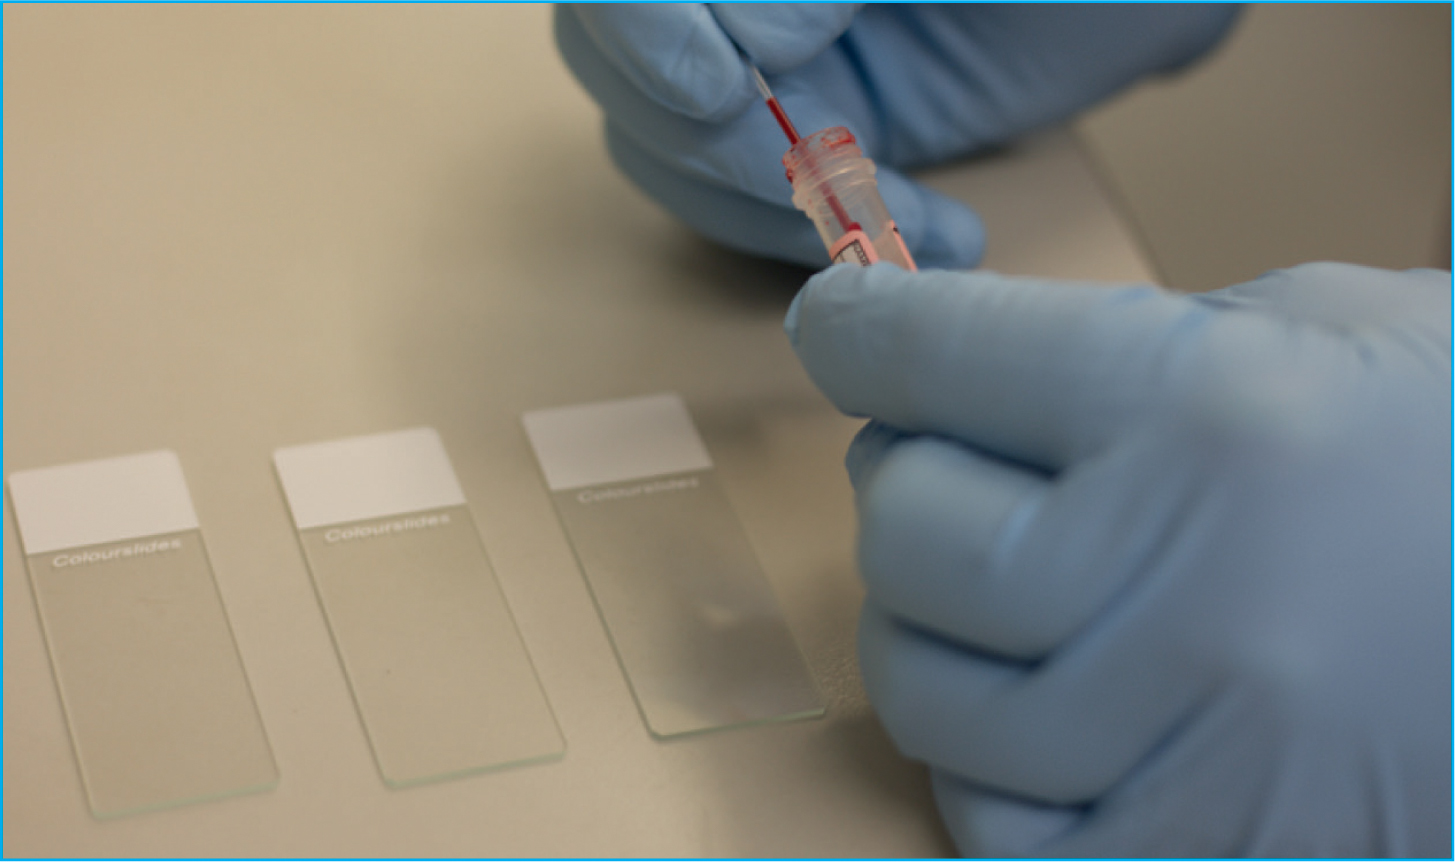
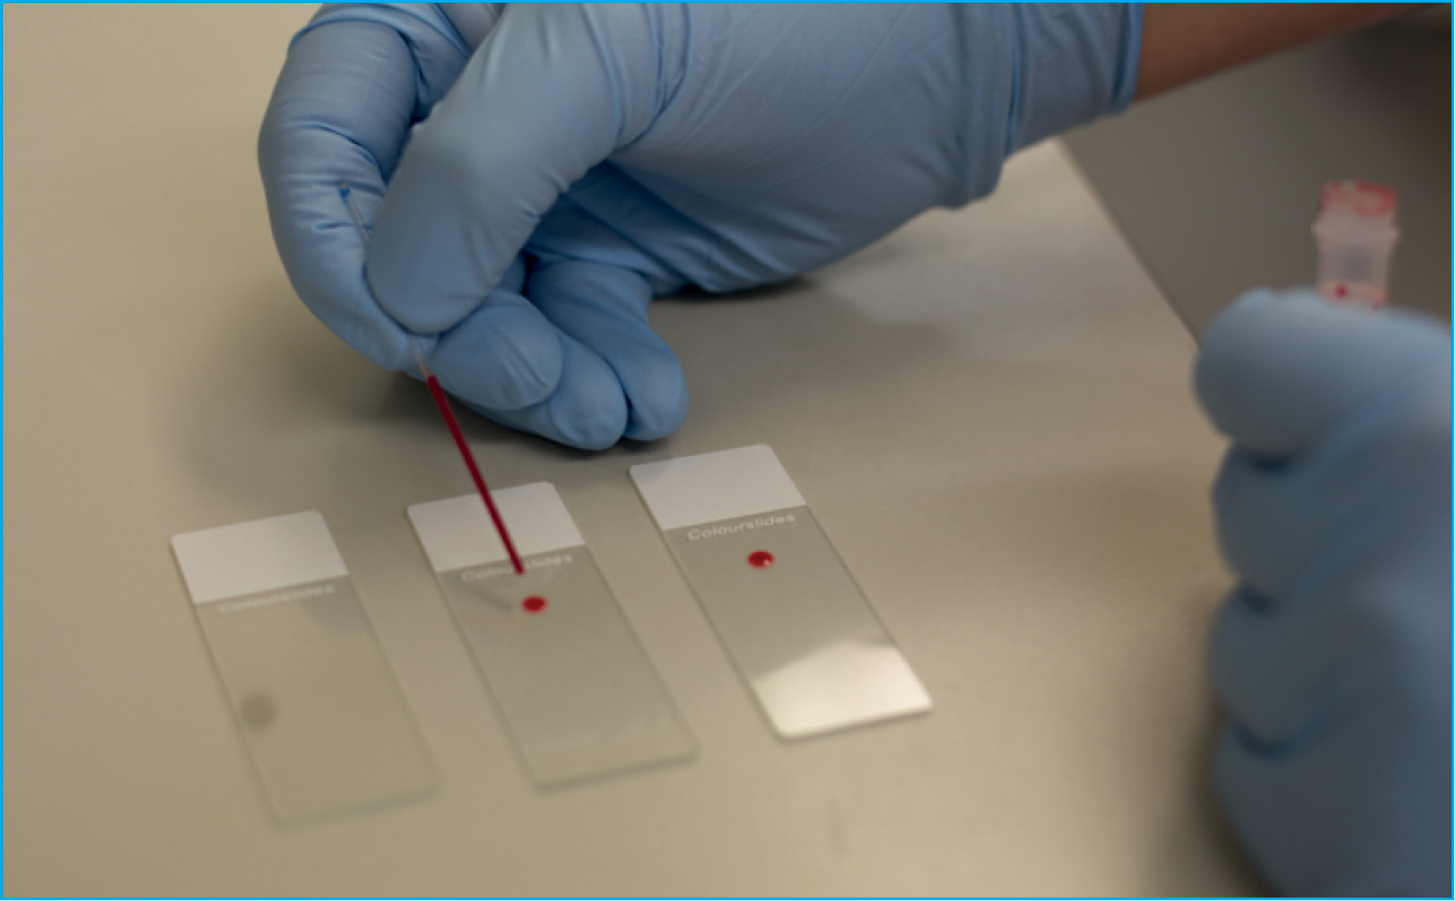
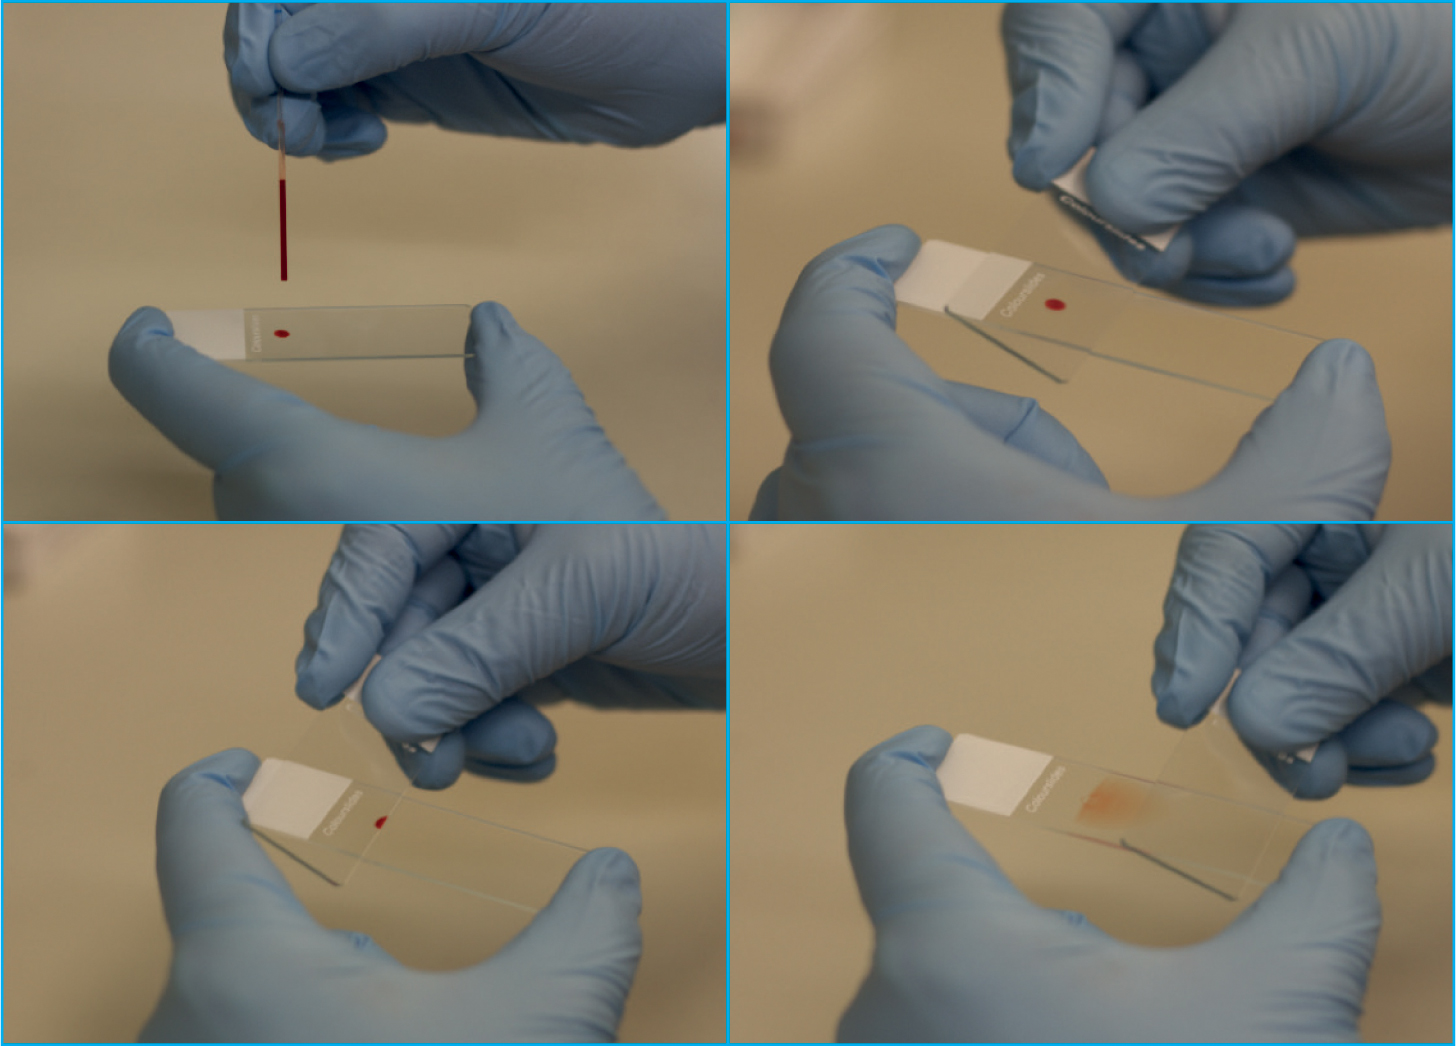
First, using a capillary or microhaematocrit tube, rather than a 1 ml syringe, will allow for better control when placing a drop on to the microscope slide. Fill the capillary tube at least halfway with blood (Figure 5) and place a small drop (roughly 3–4 mm in diameter) of blood just in front of the frosted edge of a microscope slide (Figure 6). It is best to use the side of the microhaematocrit tube to dispense the blood by gently taping the tube against the glass slide, do not place a finger over the end of the microhaematocrit tube as this will form a vacuum inside the tube, preventing blood from leaving the tube.
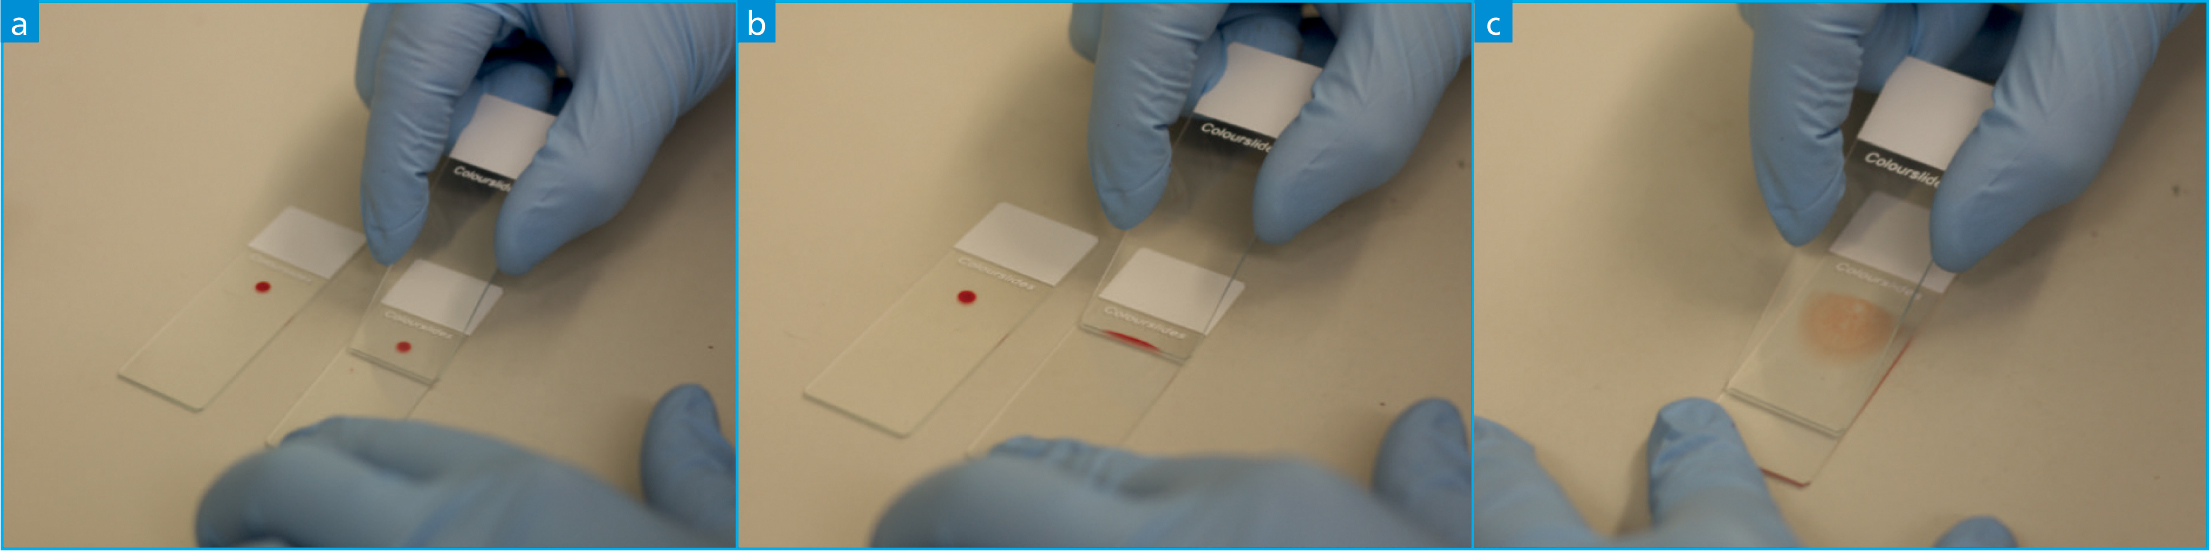
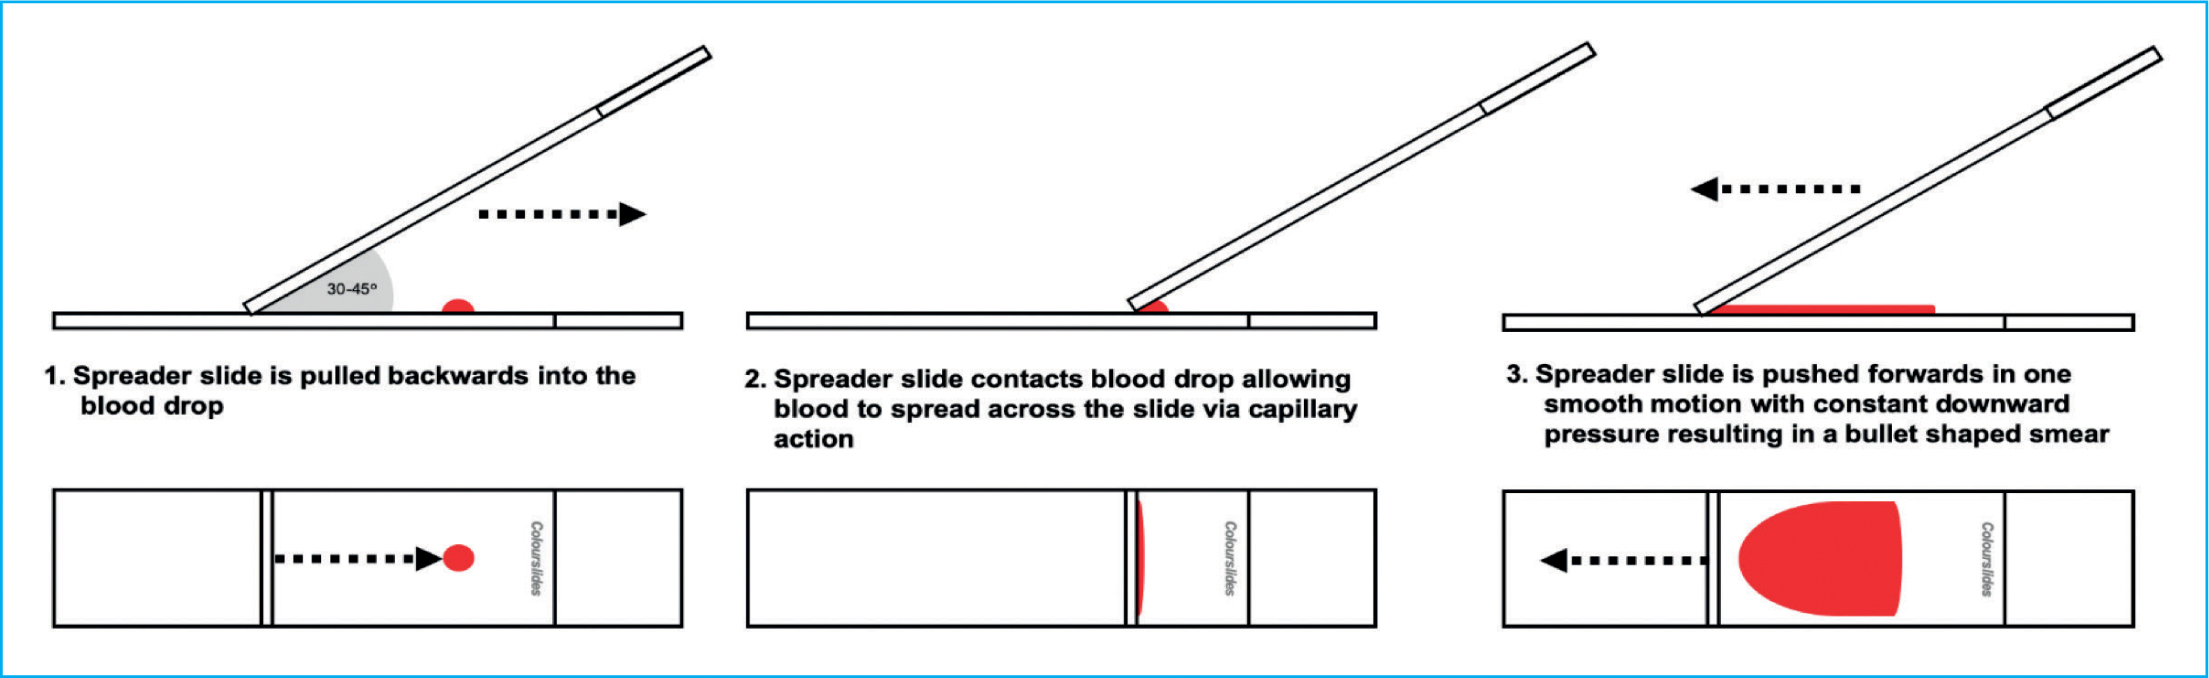
The most common technique used when preparing a blood film is the ‘wedge’ or push method which results in the production of a blood smear without the presence of straight edges on the sides of the smear (Perkins, 2003; Thrall, 2012). To make a blood smear, a clean spreader slide should be placed in front of the blood drop and held with the thumb and index finger either side of the slide (Figure 7a). For the majority of samples, the spreader slide should be held at a 30–45° angle (Tkachuk and Hirschmann, 2007; Thrall, 2012), and confidently brought back into contact with the blood drop with constant downward pressure, ensuring the spreader slide is in firm contact with the smear (Figure 7b). As soon as the drop begins to flow across the spreader slide via capillary action, the spreader slide is rapidly pushed forward in one smooth motion, not lifting the spreader smear before the blood has run out and a feathered edge has been formed (Figures 7c and 8) (Harvey, 2012).
For a good quality smear you are looking for a bullet/guitar pick like shape which is in the middle of the slide, it should have a uniform monolayer (without streaks or clumps of cells), a smooth feathered edge around the curved edge of the smear, no straight edges and have used the whole drop of blood (Figure 4). If this is not achieved it is recommended to start again as a poor quality slide is a torment, the extra time and care taken to produce a good quality smear will be rewarded later when it comes to being examined.
Alternative procedure for making blood smears
Although the above protocol is pretty standard across veterinary haematology, there are other methods for achieving the same result. As long as the same key steps are followed ensuring you control the angle and speed of the spreader slide is appropriate for the blood sample being used, you should achieve a diagnostic blood smear. For example, some individuals prefer to hold the smear in the air and using the side of a microscope slide as the spreader slide and following the above procedure (Figure 9).
Inappropriate procedure for making blood smears
It has been noted by the authors, that often inexperienced individuals will try to push the spreader slide into the blood droplet, and then pull the spreader slide out of the blood drop to create the blood smear. Typically, this method will result in a short thick smear with an unusual shape (Figure 10). Other common errors include starting behind the blood drop and pulling the spreader slide into the blood, allowing the blood to spread across the slide and then further pulling the slide through the drop to create a smear, typically with irregularities in shape and with streaks. Another incorrect method includes placing the spreader slide directly on top of the drop, waiting for the blood to spread and then pushing the spreader smear away, which results in blood being both pushed and pulled by the spreader slide resulting in streaks throughout the blood smear.
Common errors when making blood smears
If you are having trouble producing a quality diagnostic smear it is often down to incorrect technique, by making small adjustments, a poor-quality smear can quickly turn into a good quality diagnostic one (see Tables 1 and 2).
Table 1. A table of commonly seen errors and suggested corrections in technique to achieve high-quality diagnostic blood smears
| Correction of technique | |
|---|---|
| Angle of spreader slide |
|
| Speed of spreader slide |
|
| Downward pressure of spreader slide |
|
| Hesitation |
|
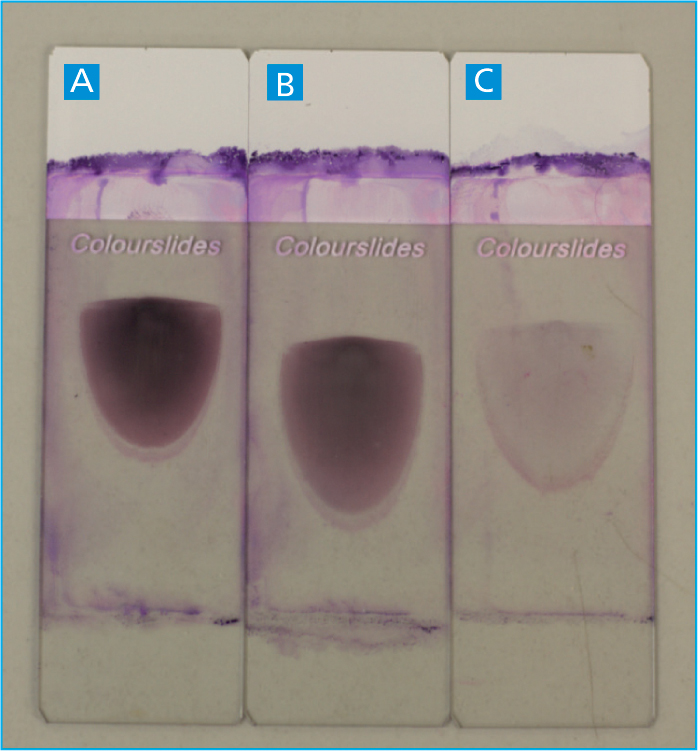
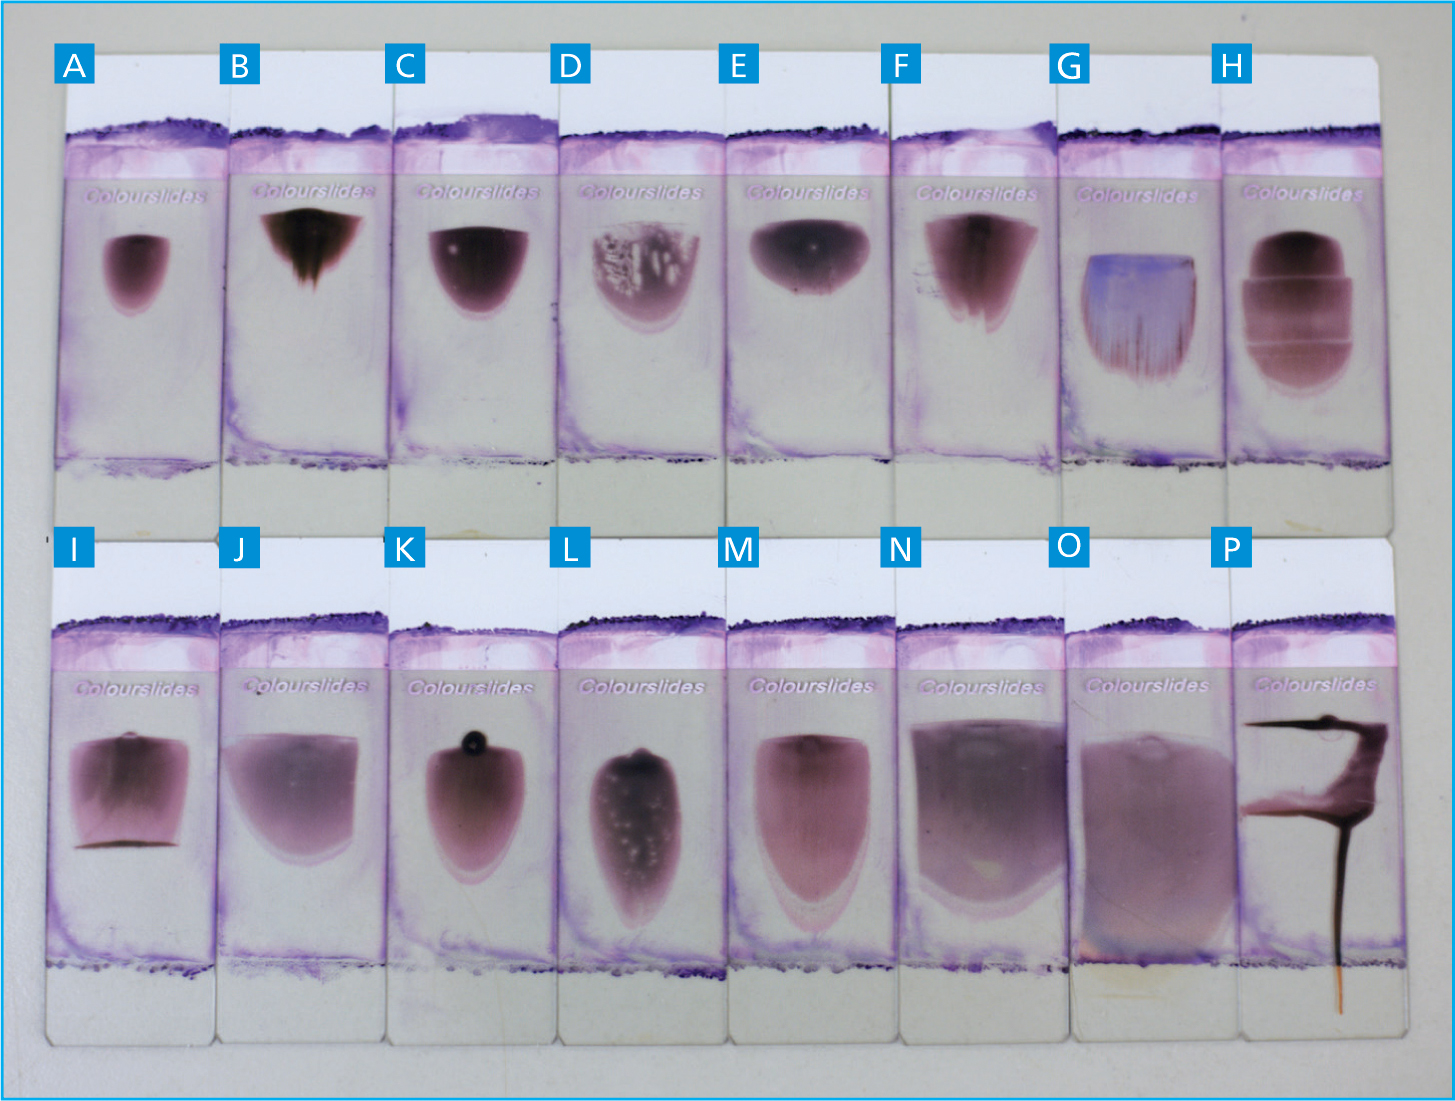
Table 2. A table providing a list of undesirable blood smear shapes and sizes as demonstrated visually in figure 11.
| Issue with smear | Troubleshooting | |
|---|---|---|
| A | Smear appears too small |
|
| B | Smear appears uneven and streaky |
|
| C | Smear appears too thick |
|
| D | Smear appears uneven with ‘holes’ in body of smear |
|
| E | Smear appears too short and too thick |
|
| F | Smear appears streaky with a ‘notch’ taken out of the feathered edge |
|
| G | Smear appears to only be streaks in the feathered edge |
|
| H | Smear appears to have horizontal lines across the body |
|
| I | Smear appears to have a straight edge at the end of the smear |
|
| J | Smear appears to have a straight edge down one side |
|
| K | Smear appears to have the drop left at the back of the smear |
|
| L | Smear appears too narrow and thick |
|
| M | Smear appears long with an extended feathered edge |
|
| N | Smear appears too wide |
|
| O | Smear appears too long and too wide |
|
| P | Smear appears pushed to one side of the slide |
|
Conclusion
It is vital to practice and become efficient in the production of blood smears to aid in the diagnosis of various diseases. A study by Preast et al (2007) suggested that prior knowledge of how to produce a diagnostic blood smear from computer aided instruction with animations is beneficial before practicing and learning how to make a blood smear practically. Therefore, it is hoped this publication will provide the same level of tuition to aid learning and development of the practical skill in producing high-quality diagnostic blood smears. Accurate analysis of blood smears begins with excellence in the preparation. Each blood smear should be in the middle of the slide, have a uniform monolayer with a smooth feathered edge, no straight edges and use the whole drop of blood.