

The indications for infusion therapy in small animal practice are varied, with many patients requiring and benefitting from support of their fluid balance and cardiovascular function. Examples of patients include those with medical conditions, surgical patients and, of course emergency patients. The decision about which type of fluid to administer to a patient is the remit of the veterinary surgeon (VS), however it is essential registered veterinary nurses (RVNs) understand the composition of fluids used in their workplace and how they exert their effects to ensure they can monitor a patient's progress effectively. This will enable the RVN to identify problems promptly, which can be reported to the VS and addressed.
Aims of infusion therapy
Following initial examination and diagnostics the VS will have established issues with hydration, tissue perfusion and fluid volume or loss, will prioritise their aims or goals, will select the most appropriate fluid, determine an administration rate and decide on the most appropriate route for administration (Aldridge and O'Dwyer, 2013). During planning the VS will take into consideration: the nature of the fluid disturbance, whether it is acute or chronic; the pathology of the disturbance, whether there is an acid-base, oncotic or electrolyte problem; any comorbid conditions, so the presence of one or more additional disorders or diseases alongside the primary underlying disease condition (Davis et al, 2013). It is important that the RVN is aware of the plan, the associated goals, the time-frames for their achievement, and how to appraise the patient's progress towards them.
Pre-infusion blood sampling and testing
Pre-infusion blood sampling and testing provides a wide variety of information to the VS about the patient's fluid balance and organ function. For example, haematological analysis reveals information about the patient's haematocrit (packed cell volume (PCV)), red blood cell numbers, white blood cell numbers, platelet numbers and haemoglobin levels. Biochemistry testing analyses levels of urea, creatinine, glucose, total protein/solids (TP/TS), liver function enzymes and lipase, with electrolyte testing revealing levels of sodium, potassium and chloride. These tests can detect abnormalities such as anaemia, hypo and hyperproteinaemia, kidney disease, and hypo and hyperglycaemia (Posner, 2016) and, from an infusion therapy perspective, identify the precise nature of the patient's current fluid balance. Davis et al (2013) also advise measuring serum lactate and blood gases as these can provide crucial information regarding tissue perfusion, linked to circulatory efficacy. All of this information is useful to the VS when making decisions about the fluid therapy plan and goals to be achieved therein.
Blood samples are commonly obtained from the jugular, cephalic or lateral saphenous veins, and the RVN should be proficient in the technique for optimal sample procurement to prevent problems with the sample which may impact accurate analyses.
Obtaining the blood sample
A detailed description of the optimal procedure for obtaining a blood sample is beyond the scope of this article. In brief:
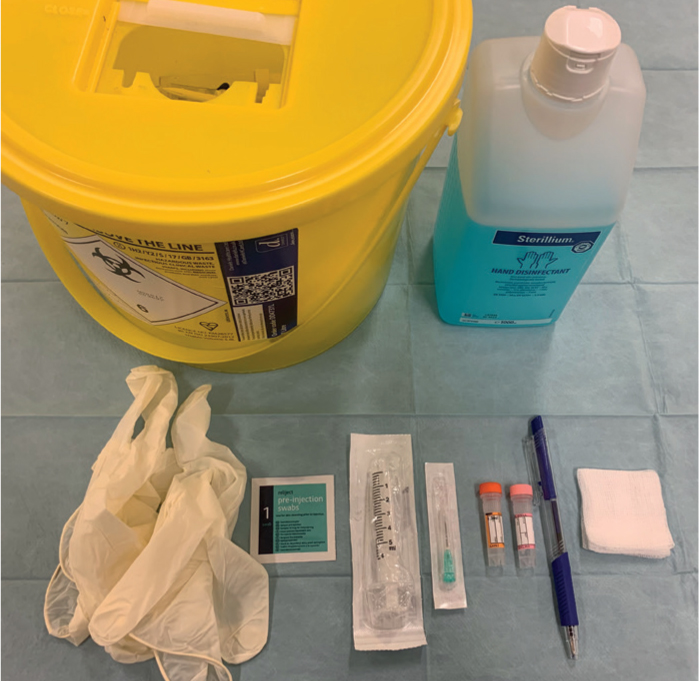
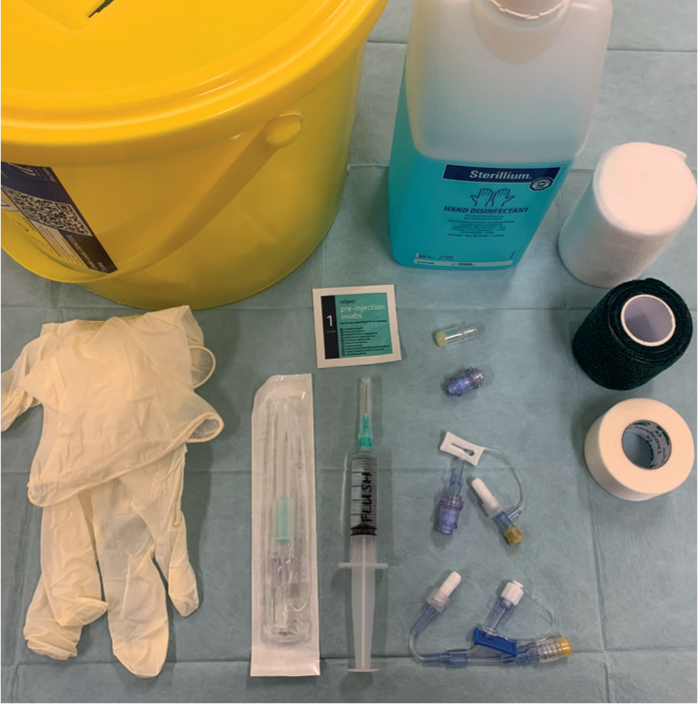
- Hands should be washed and equipment prepared (Figure 1)
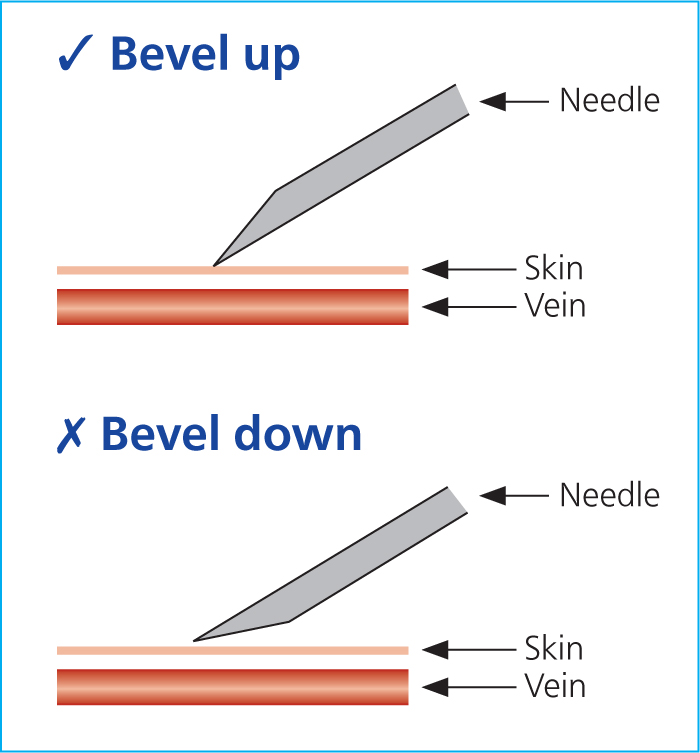
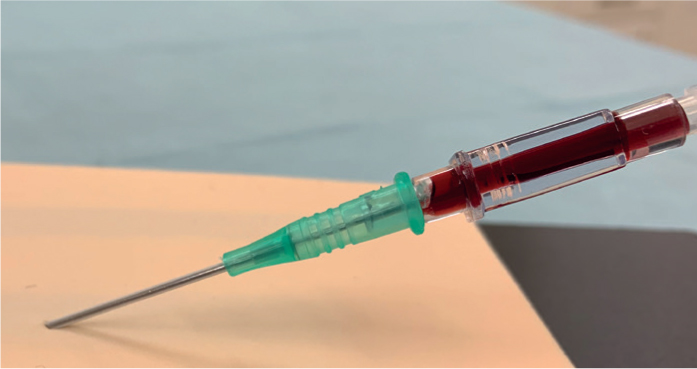
- Check the assembled 21G needle and syringe to ensure the needle is mounted bevel up (this ensures the sharpest tip of the needle pierces through the skin and into the vein first) (Figure 2) — the plunger must be preloosened
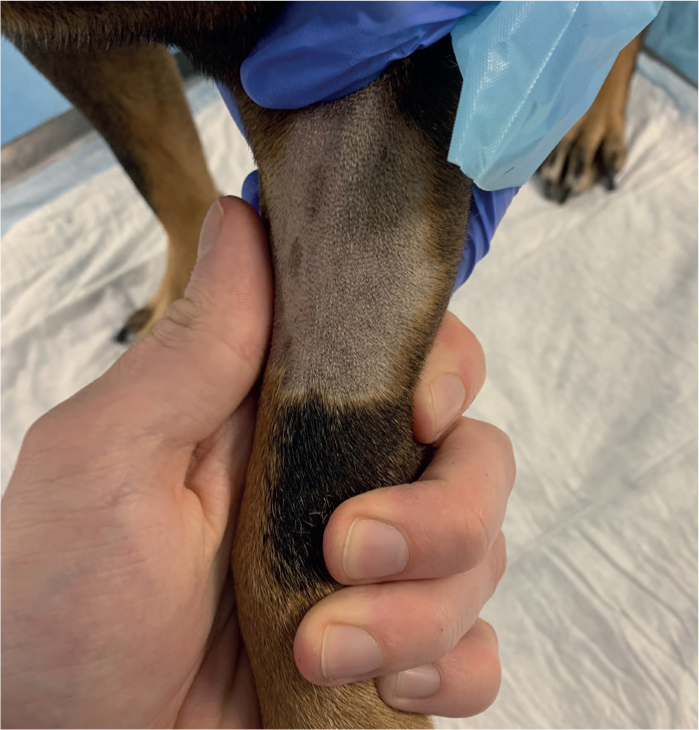
- Restrain the patient according to the vein selected and clip away a patch of fur (Figure 3)
- Raise the vein and clean over the skin with antiseptic solution
- Insert the needle, bevel up, through the skin and into the vessel. A fairly shallow angle is sufficient but will be dictated by the size of syringe being used
- Gently withdraw the plunger until you have the required volume of blood and stop raising the vein
- Remove the needle and decant the blood into a correctly labelled tube.
Pre-infusion patient assessment
A clinical/physical examination is essential prior to infusion therapy, which the VS will perform initially to establish baseline parameters and assess patient cardiovascular health. Baseline parameters must be accurately recorded at the point of admittance because patient progress needs to be assessed against them to identify improvement or deterioration, and whether specific goals are being achieved or not. How frequently these are reassessed will depend largely on the type of patient and their clinical status; for example, a healthy surgical patient requiring intravenous fluid therapy (IVFT) during anaesthesia is very different to a critical medical patient presenting in Addisonian crisis.
As discussed by Davis et al (2013) and Aldridge and O'Dwyer (2013), a thorough preinfusion patient perfusion/hydration assessment should include the following:
- A standard, thorough, hands-on physical examinationof the patient from the tip of the nose to the tip of the tail. Any abnormalities should be noted in the clinical records. The patient's skin turgor and globe retraction in particular should be assessed in relation to hydration.
- Temperature— this should be recorded at admittance and then retaken as often as the VS deems is necessary. Patients that are hyper or hypothermic will need more regular temperature checks than normothermic patients, but the condition and temperament of the patient should also be considered when planning reassessment times, for example it may be wise to avoid frequent checks in particularly fractious animals or where they have concurrent injuries such as a fractured pelvis. Aside from the patient's diagnosis, hypothermia could be linked to hypovolaemia and pyrexia to phlebitis development associated with their intravenous (IV) access devices. Comparing core rectal temperature versus a patient's concurrent toe web temperature can also provide an indication about their perfusion status; a toe web reading of greater than 4°C cooler than the rectal temperature can indicate poor or reduced perfusion, and therefore less heat transfer to the extremities.
- Pulse— the rate should be recorded to identify cases of tachy or bradycardia, but it is also important to check for pulse deficits by auscultating the heart while feeling the pulses to ensure they match beat-for-beat, and the characteristics or quality of the pulse should also be noted, for example whether it is strong or weak. Both central, for example femoral, and peripheral, for example dorsal pedal, pulses should be assessed because in cases of circulatory compromise the peripheral pulses will be lost first, which needs to be identified.
- Respiration— the rate should be recorded along with the effort the patient is making to breathe if this is abnormal. Tachypnoea may be caused by pain, or stress in unfamiliar environments, but it could also be linked to hypovolaemia.
- Lung sounds— the lungs should be auscultated at admittance to ensure there is normal air movement during inspiration and expiration, over all different areas of the chest wall. Fluid overload can result in altered lung sounds, so being proficient in the appraisal of such sounds is essential to the ongoing care of patients receiving infusions.
- Mucous membrane (MM) colour— this should be assessed and noted on the clinical record at admittance, and monitored thereafter. Healthy, pink MMs indicate adequate perfusion of the tissues, whereas pale or white MMs can be indicative of hypovolaemia. If it is possible to obtain an oxygen saturation reading via pulse oximeter this can also add to the perfusion assessment information, or blood gases could be analysed.
- Capillary refill time (CRT)— as for MM colour, the CRT should be assessed and noted on the clinical records at admittance, and monitored thereafter. A brisk CRT is normal in a patient, approximately 1–1.75 seconds and definitely less than 2 seconds (<2s). A faster CRT may indicate fluid overload, whereas a prolonged CRT may indicate decreased cardiac output and vasoconstriction, perhaps due to volume disturbances.
- Blood pressure (BP)— this is extremely useful with regards to non-invasive monitoring of perfusion in patients. A baseline BP measurement should be taken around the time of admittance using the Doppler method, but remember that allowing the patient time to adjust to its new surroundings is beneficial in relation to obtaining a true reading, and then serial monitoring is advisable to assess the efficacy of the IVFT. The frequency of monitoring depends on the patient's clinical status and fluid administration plan.
- Demeanour/mentation— if a patient is hypovolaemic and there is an inadequate supply of oxygenated blood flowing to the brain the patient will have a poor demeanour or reduced mentation. As optimal blood flow is re-established during IVFT administration this should improve, with the patient becoming more alert. To be able to identify improvements or deterioration this needs to be assessed and recorded at admittance. Each practice needs to ensure they have a scoring system available for this, one which is interpreted and used by all members of staff in the same way. Something like the Glasgow Coma Scale, used in neurological patient assessment and monitoring, could be useful for the purpose.
- Bladder status— this is important to note at the time of admittance because the administration of fluid is naturally closely linked to the patient's output, and urine output (UOP) is an important ongoing assessment method in relation to monitoring a patient's fluid status. The size of the bladder should be assessed and potentially expressed at the point of admittance so it is devoid of urine before the commencement of IVFT administration.
- Bodyweight— this is important to record at admittance and monitor as sudden changes in bodyweight are usually attributable to changes in a patient's body water content.
It is essential the RVN is knowledgeable about all of the above parameters and is proficient at reassessing all of them. It is also vital they know what the normal ranges for these parameters are, where appropriate. There is no point measuring and recording a patient's temperature, pulse and respiration without knowing whether these values lie within or without the normal limits. Abnormal readings need to be recognised, assessed in relation to all of the previous readings, and brought to the attention of the VS if there is a concern.
Preparing infusions
The VS will decide which type of fluid is required for each patient following assessment, and also the rate at which they want the fluids to be administered. RVNs must be knowledgeable about the types of fluid available for use, how they work when administered, appreciate why a particular fluid has been selected in relation to a patient's condition, and be able to calculate and recalculate administration rates for all patients according to their changing needs.
Aseptic technique is essential when preparing fluids for administration. A brief guide to preparing for infusion is given below:
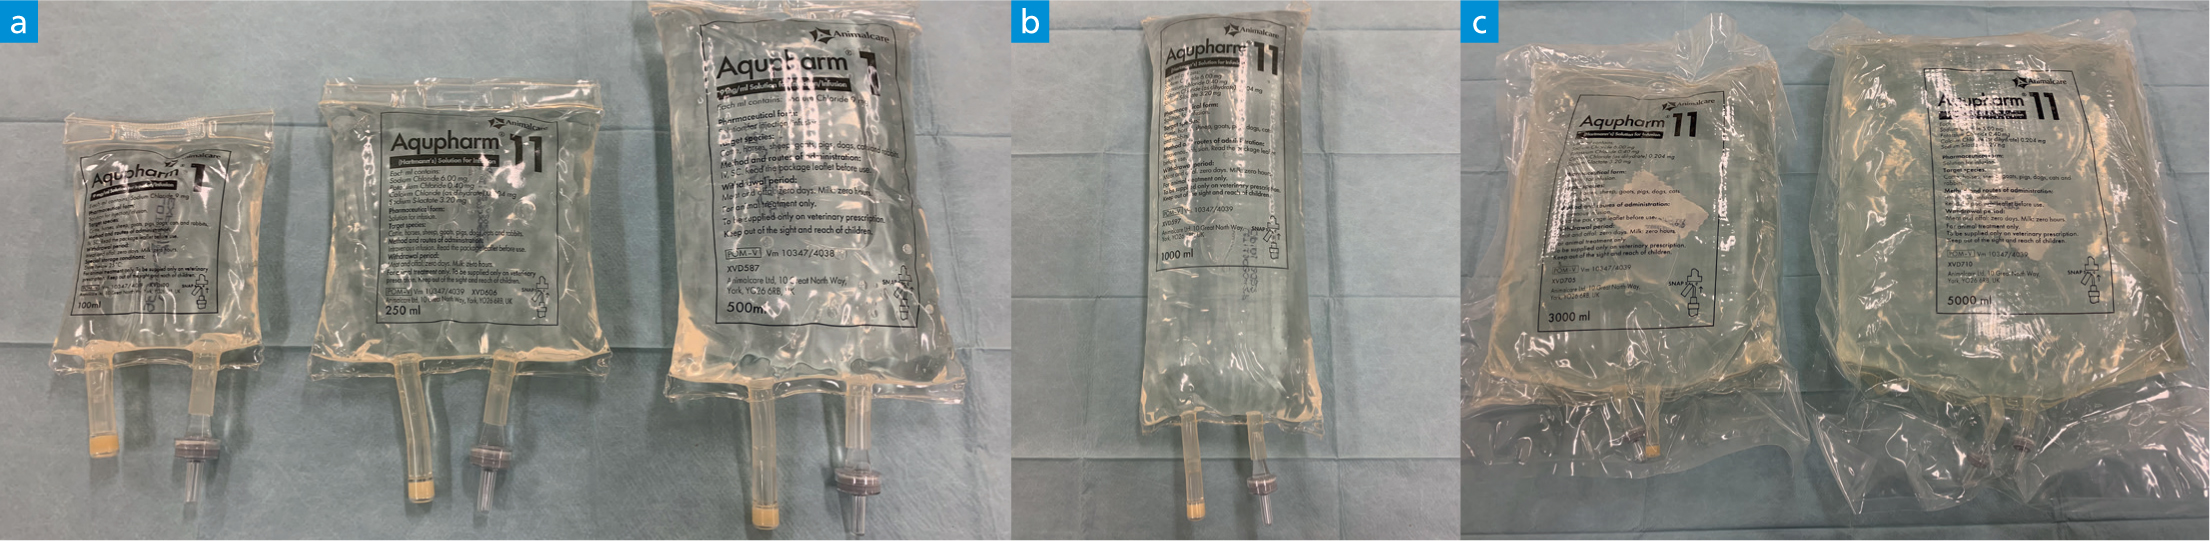
- Select the correct fluid type and size of bag(Figure 4)
- Select the correct giving set (Figure 5)
- Ensure any extension sets have been selected (Figure 6)
- Check the date on the fluid bag, the colour of the fluid and check for any precipitates and hang on a drip stand
- Aseptically spike the fluid bag with the giving set and gently squeeze the giving set chamber until it is half to two thirds full of fluid (Figure 7)
- Slowly open the regulator to avoid the formation of bubbles and run out a few drops to ensure the fluid is right to the end of the giving set. If the giving set has injection ports, an air lock is often created in these locations as the fluid runs through. These are often not problematic and the air does not frequently dislodge and move anywhere. However, to avoid this altogether, the fluid can be slowed down as it approaches the port and the port then inverted so the bung is facing the floor (Figure 8). This enables the fluid to drop down into the port and then rise up and out of the port before continuing its journey along the rest of the tubing.
- Check the tubing for significant bubbles and run these out. Then, hang the tubing over the drip stand until it is required leaving the cap in place
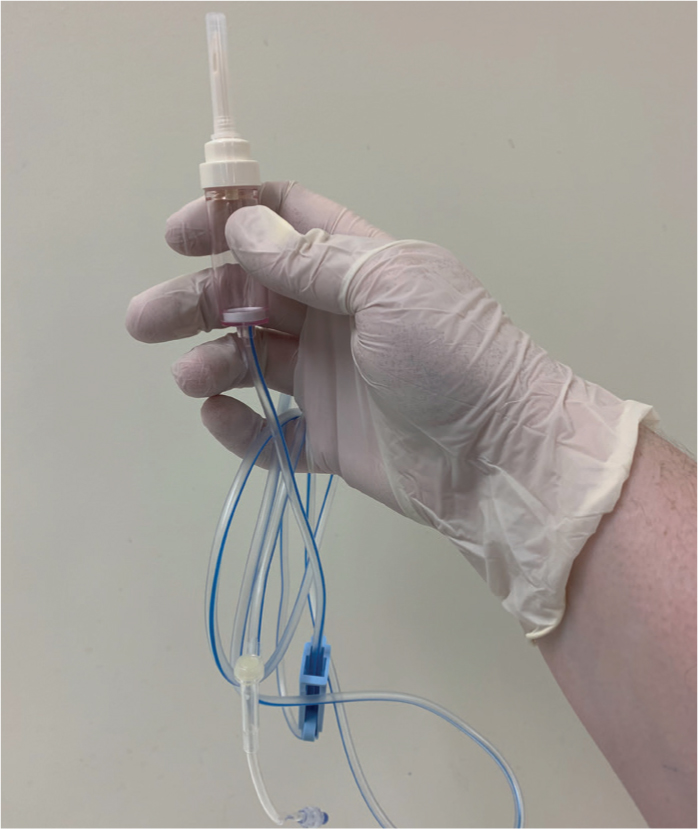
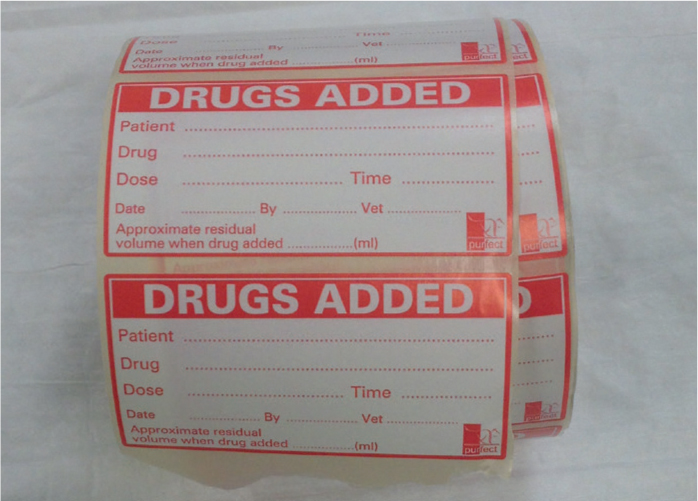
- Spike the fluid as requested by the VS — the RVN should swab the fluid bag injection port with surgical spirit, allow this to dry/evaporate, and then aseptically inject the required drug into the fluid bag. A ‘drugs added’ label should be completed and affixed to the fluid bag — 1 label per drug added (Figure 9).
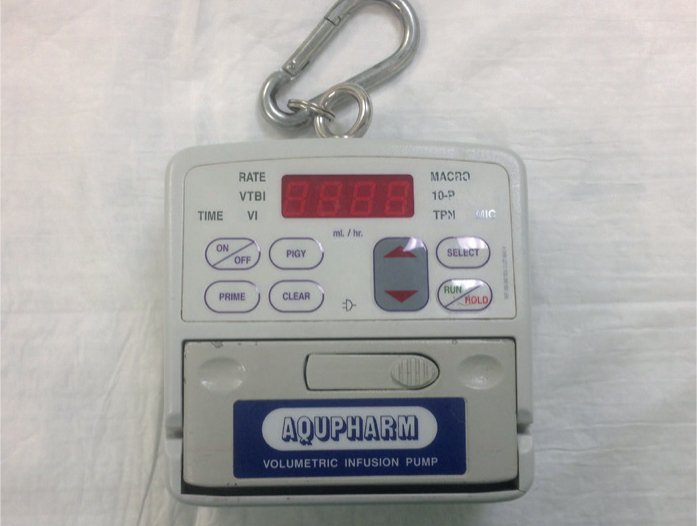
- Set up the infusion pump — before attaching a new patient's giving set to an infusion pump the RVN should set the calculated rate in ml/hour, they should set the volume to be infused (VTBI) to the volume of the fluid bag (or just a little less) to ensure the alarm sounds before it runs dry, and the volume infused (VI) should be cleared from the previous patient (Figure 10).
- Record the fluids that have been set up thoroughly and accurately on the patient's hospitalisation record.


Obtaining IV access
There are many veins which can be used to secure IV access, including the jugular, cephalic, lateral saphenous, medial saphenous and marginal ear (auricular) veins (Aldridge and O'Dwyer 2013). The choice of vein depends on:
- The type of catheter being inserted, for example over-the-needle catheters (normal peripheral vein catheters) and over-the-wire catheters (central venous catheters) are placed in different veins to each other.
- The species and breed of patient. In rabbits, often the most sensible IV access point is the marginal ear vein, which may also be the case with some short, bendy-legged breeds of dogs that have large ears. In most other animals the cephalic vein is an appropriate first choice in the absence of local injuries.
- Why fluids are being administered. If large volumes of fluid need to be administered rapidly to a large critical patient a central venous catheter would be useful (if placement of such a device is possible considering patient health and safety relating to sedation). If a central line is not possible, two short, wide bore peripheral catheters would be the next best option.
- Excretions— if a patient has vomiting, diarrhoea, hypersalivation, a purulent vaginal discharge, urinary incontinence, and so on, the RVN must assess where is best to place an IV catheter to avoid soiling of the dressings and subsequent contamination of the insertion site.
- Security— the RVN must assess the patient and factor in security of the IV catheter when deciding which vein to use. It is relatively easy to secure a cephalic IV catheter compared with some lateral or medial saphenous IV catheters.
- Access— the RVN must consider access to the IV catheter post-placement. It may be that the patient is a little aggressive, so extension sets are very useful even if the patient is not on an infusion. When placing an IV catheter into the medial saphenous vein it is useful to have a T-connector (or other extension set according to patient size) which can be secured to the lateral aspect of the patient's limb to facilitate easier access.
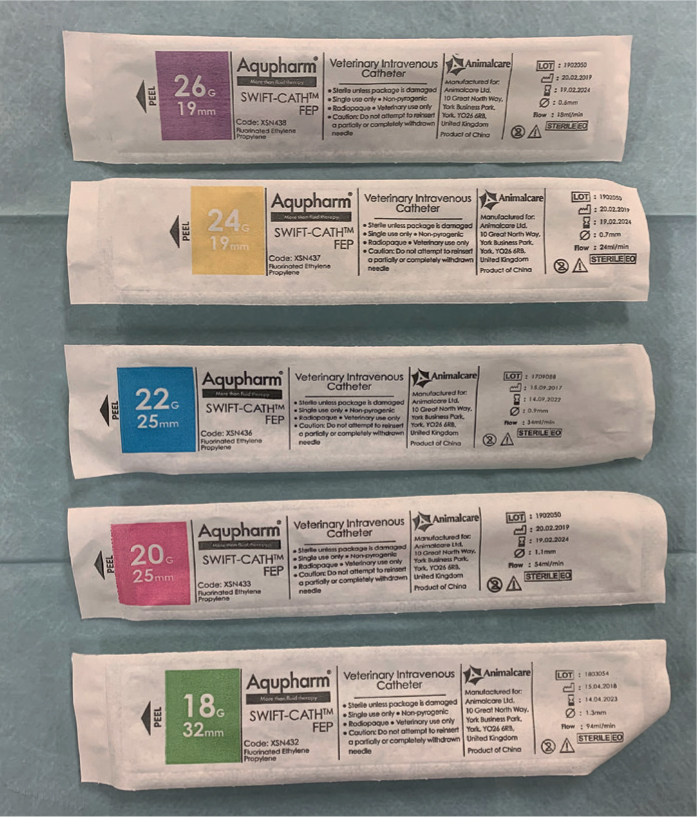
When the most appropriate vein has been identified, the most appropriate IV catheter must be chosen (Figure 11). The biggest size possible that will sit comfortably within the vein should be selected as the larger the gauge the less resistance there is to flow through the catheter. Aldridge and O'Dwyer (2013) outlined that the flow rate through a catheter is related to the radius to the power of four, so if the diameter of the catheter is doubled for instance, the flow rate will increase 16-fold. They also highlighted that longer catheters increase resistance to flow, so if large volumes of fluid need to be administered rapidly, a short length wide bore catheter is most effective (Aldridge and O'Dwyer 2013). The author typically uses a purple catheter for small rabbit ear veins and tiny puppy and kitten veins, yellow catheters for larger rabbits and larger puppies and kittens, blue catheter for small dogs and cats, a pink catheter for medium to large cats and medium dogs, and green catheters for some medium dogs and large dogs, and even bigger gauges for giant breeds of dog. It is difficult, and inappropriate, to put a specific weight to the patient sizes just mentioned in order to try and categorise them; visual assessment of an individual patient's vein following clipping is essential to help the RVN to decide which gauge to choose.
The equipment prepared for IV catheter placement should include (Figure 12):
- Restraint aids as required
- Correct sized IV catheter — it may be wise to have a couple of different sizes available
- T-connector or Y-connector
- Bungs/(needle-free) injection ports
- Sterile flush solution
- Antiseptic skin preparation solutions/swab(s)
- Hand wash +/- gloves
- Sharps bin
- Tape
- Gauze swabs
- Bandage materials
- Good light source
- Clean, functional clippers — ideally the quiet ones, especially for cats.
Step-by-step guide for the placing an over-the-needle IV catheter into a peripheral vein
- Wash hands. It is also advisable to wear gloves, especially from the point at which the cleaning of the clipped patch commences.
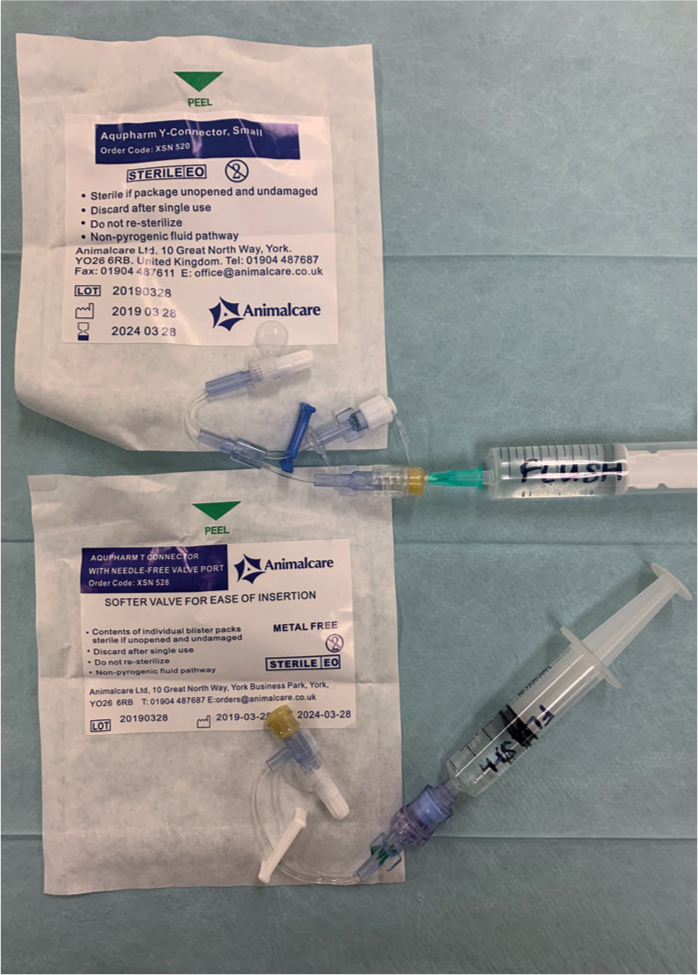
- Ensure all equipment is prepared for catheter placement. This also involves ensuring that T-connectors/Y-connectors etc have been primed with sterile fluid (Figure 13).
- Request patient restraint according to the vein selected.
- Clip a patch of fur away over the vein. Remove all loose fur and discard appropriately. How much fur to be removed depends on the patient and its coat type. Some patients have very short hair so there is not much fur to get tangled in the tape as the RVN attempts to secure the catheter. Other breeds, however, are extremely hairy and have a lot of long fur on their limbs so it may be wise to clip their limbs circumferentially to ensure no fur can be trapped in the tape.
- Ask for the vein to be raised by the assistant to double check the fur clip is in the correct place. Decide which size catheter to use and choose the insertion site — start at a distal point of the vein and be mindful of the risk of the catheter kinking due to patient positioning, for example a patient with short legs bending their elbow may kink the catheter if it has been placed high up the cephalic vein.
- Use the antiseptic solutions to clean the skin over the vein.
- Ask for the vein to be raised(if the assistant has stopped).
- The operator should use their non-dominant hand to hold the limb and place their thumb alongside the vein to stabilise it. The operator should not touch the cleaned, chosen insertion point at any point with their fingers, gloved or not.
- Insert the stylet and catheter through the skin over the vein at approximately 30° until a flashback of blood is seen in the hub of the stylet(Figure 14). If the patient has particularly tough skin it is advisable to make a facilitative incision, or relief hole, in the skin using an 18 or 20G needle. This needs to be done carefully at the insertion point to avoid damaging the vessel underneath, but allows easier passage of the catheter through the skin afterwards.
- Once the flashback of blood in the stylet hub has been seen, the stylet and catheter should be advanced another 1–2 mm into the vessel. This is absolutely essential to do to ensure BOTH the tip of the stylet AND the tip of the catheter are lying within the vein walls (Figures 15). The RVN must remember that the stylet tip sticks out further than the end of the catheter, and as such it may be sitting just inside the vessel when the catheter tip is not. This means, when trying to feed the catheter off the stylet, the catheter will just bounce against the outer wall of the vein and the whole process will be unsuccessful — this is a ‘not far enough’ situation. Do not advance the stylet and catheter any further than this because it risks piercing the other side/more distant side of the vessel wall, which will also result in an unsuccessful procedure — this is a ‘too far’ situation.
- Drop the angle of the stylet and catheter to around 10° and feed the catheter off the stylet into the vein until the hub of the catheter contacts the skin(Figures 16). Many people do this one-handed, holding the hub of the stylet between the thumb and middle finger while using the index finger to push/slide the catheter along the stylet into the vein. While this works on many occasions, a one-handed technique can cause problems. The operator may, inadvertently, pull the stylet backwards a little as they start to advance the catheter, which could result in the stylet exiting the vein along with the tip of the catheter which culminates in the ‘not far enough’ situation described above. Ideally, if there are others around to help control the patient's limb as required, the operator should hold the stylet hub with their dominant hand and use the fingers of their other hand to advance the catheter into the vein. This means there is absolute stability and no movement of the stylet in the vein, so the catheter should slide straight into the vein.
- Remove the stylet and discard into the sharps bin.
- Ask the assistant to stop raising the vein and it is useful for them to then gently apply pressure to the vein above where the catheter is lying to stem blood flow. There is no need for the assistant to place this finger over the actual insertion site itself.
- Place a bung or attach the T-connector/Y-connector. Sometimes it is easier to place the bung which comes with the catheter immediately after the stylet is removed to facilitate initial taping of the catheter to the leg.
- Flush the catheter with sterile saline to ensure correct placement and patency.
- Tape the catheter in place creating a tourniquet. Ensure the skin around the catheter is clean and dry before applying tape. The first part of the first strip of tape should be placed between the catheter hub and the patient's skin. The catheter hub can then lie on top of this tape and the rest of the strip brought around the back of the patient's leg and over the top of the catheter hub (Figure 17). An additional strip of tape is usually necessary to provide extra security. The operator needs to ensure that the tape placed does not prevent the attachment of connectors to the catheter because it is too close to the edge of the hub. It is wise to pinch the tape over the top of the catheter hub at this point to ensure it is firmly adhered to the catheter. From personal experience the author finds that Durapore tape serves this purpose better than something like Micropore tape. The tape needs to not be placed too tightly! Remember that this tape may impede circulation; some patients may be very dehydrated (and potentially hypovolaemic), so as the tissues become better hydrated the tape may tighten creating a tourniquet effect around the limb.
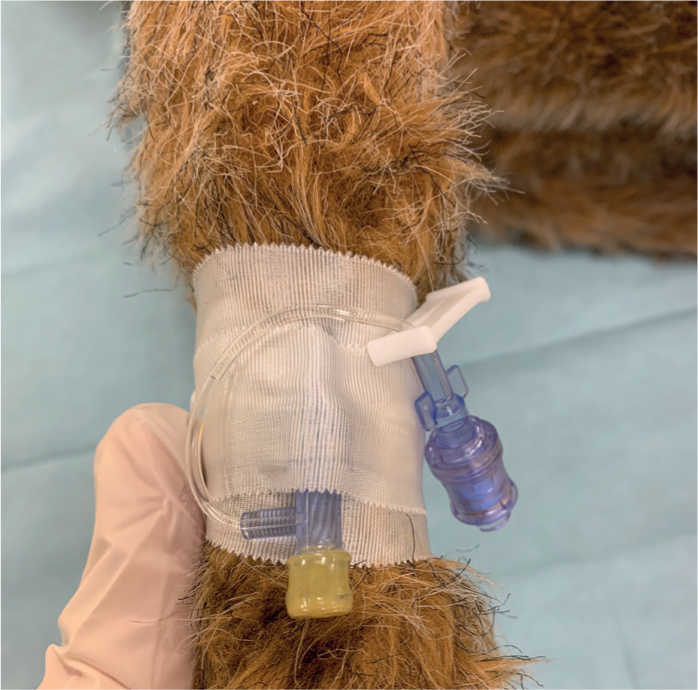
- Attach and secure a T-connector or Y-connector if this has not already been done. T-connectors and Y-connectors are useful additions to the catheter as they allow the IV to be completely secured and bandaged before attaching a fluid bag at a later point (Figure 18). They also allow for easier access to the point of fluid attachment should there be any problems. Simply attaching a bung or injection port bung at this point and taping/dressing it in place means that, if the patient does then need to be placed on fluid, the whole dressing and tape needs to be removed, potentially dislodging the catheter. Once a T- or Y-connector is inserted into and securely screwed to the catheter hub, additional tape needs to be used to protect the connection and anchor the connector to the patient's limb (Figure 19). Depending on the patient's limb conformation it may be necessary to place some additional padding between the connector and the limb before placing more tape and/or the bandage. T-connectors additionally provide an injection port very close to the patient which is useful for bolus drug administration. Y-connectors allow the administration of two compatible infusions at the same time, which can be useful in a variety of patients, especially some critical patients.
- Attaching the giving set straight to the catheter. If no T- or Y-connector is being used then the end of the giving set will be attached directly to the catheter. The cap from the end of the giving set should be removed and the tip inserted into the catheter hub, before securing the connection with the screw/locking device. Another strip of tape should be placed over this connection as described for the T- and Y-connectors. Once this is done, sometimes people coil the giving set back on itself up the side of the patient's limb and wrap more tape around that (Figure 20). If something happens that results in the giving set tubing being pulled/tugged, this loop provides a bit of ‘give’ in the line and often prevents the catheter from being pulled out too. However, should the tubing be pulled as described above it may result in the tubing kinking under the bandage close to the catheter hub, and/or might cause the catheter to be pulled into a slightly different angle to how it was initially secured against the patient's leg, potentially kinking the catheter. In either circumstance fluid delivery will be hindered. Figure 21 shows how a kink resistor can be used to prevent such problems. If the giving set is NOT being coiled back on itself as previously described, tape can be used to anchor the catheter and giving set more securely to the limb as (Figure 21).
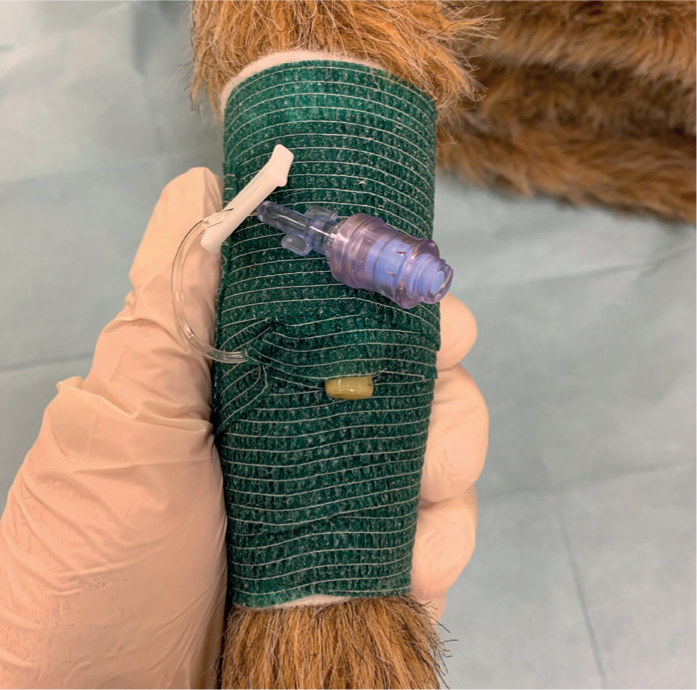
- A bandage should be placed to protect the catheter insertion sites and connectors previously mentioned. And typically a padding layer followed by a layer of cohesive bandage is sufficient. Where possible it is nice to leave the patient's foot out of this bandage so they can still use the foot. The foot should be monitored for signs of swelling. Some practices like to use different colours of cohesive bandage to indicate the IV status of a patient at a glance, for example red means there is an IV in, and green means the IV has been removed. It may be prudent to use white cohesive bandage to indicate that an IV catheter is in situ so any strike-through can be readily identified.
- Record the IV placement details on the patient's hospitalisation sheet.


Administering an infusion and monitoring patient progress
A patient receiving IVFT should receive regular reassessments to evaluate the efficacy of the infusion (Gurney, 2008). Once the initial infusion is set up as previously described, the RVN is responsible for ensuring the administration continues as prescribed by the VS, and for monitoring and recording the patient's progress. The frequency of these checks will depend on the individual patient and goals set.
A basic initial check involves looking at the infusion equipment to check the fluid is still running, or that the infusion pump is still in operation. This does not necessarily have to be recorded each time it is checked, for example every time the author walks past any patient's cage and they are receiving fluid therapy, ‘dripping’ is automatically looked for. If a patient is not on an infusion pump then the rate should be reassessed frequently to make sure it has not sped up or slowed down, which is again something the author does regularly when passing patients in wards, as well as recording it formally at least every hour (stable critical), 3 hours (non-critical), or every time an IV medication has been administered. For unstable critical patients that are in the process of being stabilised it would be wise to record rechecks on either an anaesthetic record chart, typically every 5 minutes, or on a critical care monitoring chart that is not pre-populated with specific recheck times; the latter allows the RVN to record the time of reassessment parameters as often as required. If the patient's fluid bag has been spiked with additional medications the RVN should regularly agitate the bag to ensure the contents are well-mixed; the drug added will precipitate to the bottom of the bag meaning the patient may start to be infused with very concentrated doses of the drug. This again does not necessarily have to be recorded, and is another task the author automatically performs when walking past patients in wards that are on infusions.
At every reassessment the patient's bandage and limb/around the IV insertion site should be checked, ensuring the bandage is not soiled, there is no strike-through, and there is no sign of swelling above or below the dressing (Taylor et al, 2011). As well as a visual check the RVN should ensure they palpate the limb too. If there are any issues with the limb or dressing then appropriate actions need to be taken, for example replacement of the dressing. Should an alarm sound on an infusion pump indicating an occlusion, this process of checking the leg and bandage should be undertaken along with checking the fluid bag and giving set, rather than just trying to restart the infusion.
Catheters that are not in use, or perhaps in cases where patients are receiving fluid therapy but they are on a very slow infusion rate and have a small gauge catheter in situ, should be flushed every 4 hours to maintain their patency (Davis et al, 2013). It should be noted that normal saline is considered as effective as heparin for this purpose (Ueda et al, 2013), so is a recommended flush solution to avoid over-administration of heparin. In cases where an infusion has stopped running, removing the dressing and investigating right down to catheter level is often warranted, and Davis et al (2013) recommended that gently aspirating from the catheter prior to flushing can be performed to check for, and try to re-establish patency. To minimise the risk of hospital acquired infections associated with repeated insertions, it is recommended that IV peripheral catheters are replaced no more than every 4 days (Davis et al 2013); if they are functional and there is no evidence of a problem developing they can remain in situ. Additionally, Davis et al (2013) advised against replacing the fluid administration lines more frequently than every 4 days for the same reason. If there is evidence of infection or any other problem the IV line will need to be removed and replaced in another limb, along with a new infusion. The VS should also be informed in case any other treatment is required.
Physiological reassessment is also essential to check for improvements or deterioration in perfusion; the VS is interested in knowing the actual effect of the fluid versus the desired effect of the fluid. As homeostasis may be impaired, Aldridge and O'Dwyer (2013) stressed the importance of repeating the physical examination, rechecking all of the hydration and perfusion parameters that were assessed at admittance, and being vigilant for complication development such as phlebitis and extravasation. Clinical signs of over-administration include peripheral oedema (feet, legs, axilla, face), weight gain, chemosis, pulmonary oedema, increased respiratory rate and effort, and cerebral oedema, whereas signs of underadministration include persistent tachycardia, poor pulse quality, hypotension and reduced UOP (Davis et al, 2013).
Regarding perfusion, Aldridge and O'Dwyer (2013) recommended rechecking the heart rate, pulse quality, MM colour, CRT, and core versus toe web temperature, recording all data accurately on the patient's record. Regarding hydration, reassessment of MM moisture, skin turgor and globe retraction are useful, and the patient should be weighed again with any increase in bodyweight being deemed favourable in relation to the correction of dehydration. UOP is extremely helpful to monitor regarding hydration, with the production of 0.5–2 ml/kg/hour being the goal for hypoperfused patients (Aldridge and O'Dwyer 2013), and 1–2 ml/kg/hour otherwise. If arterial BP is being measured the RVN must be aware that a minimum of 60 mmHg for mean arterial pressure should be the goal, and also remember that a patient can be in hypovolaemic shock requiring bolus fluids while still having a normal blood pressure reading; low blood pressure is a later change in shock development and progress (Aldridge and O'Dwyer, 2013).
Repeat blood sampling and testing may be requested by the VS at various intervals to compare against the baseline results from admittance. PCV and TP are quick and easy to check, providing useful information regarding the changing or ongoing need for IVFT. If a patient's fluids have been spiked with something like potassium to correct an electrolyte imbalance, this can be reassessed and the ongoing infusion altered accordingly; hypokalaemia is a risk in chronic fluid therapy patients (Aldridge and O'Dwyer, 2013).
The RVN must monitor and accurately record UOP in patients receiving IVFT, checking it at least every 6 hours. Fluids going into the patient tend to be easy to measure, for example via the drip pump's VI record and by calculating the amount of water consumed, however fluids coming out can be more problematic to measure in the absence of an indwelling urinary catheter. The RVN should try to estimate fluid losses through vomiting and diarrhoea, for example by weighing soaked incontinence pads and assuming 1 g is approximately 1 ml of fluid. RVNs can also attempt to catch urine as it is voided and measure the volume. Aldridge and O'Dwyer (2013) advised that the fluid going into a patient should be around 10% more than the fluid coming out because there are fluid losses via sweat and evaporation from the respiratory tract that should be expected. Having compared the ‘ins’ versus the ‘outs’:
- If the patient is producing more fluid than is being administered then the fluid administration rate will need to be decreased in a hydrated patient to avoid over-infusion.
- If the patient is producing more fluid than is being administered, but is still dehydrated, the fluid administration rate will need to increase in an effort to rehydrate the patient and compensate for the ongoing losses. The RVN should also raise this situation with the VS for further investigation in case it is related to an underlying disease process.
- If the fluid going in is over 10% more than what the patient is losing, the RVN should raise this with the VS and try to establish the reason. If the patient is still dehydrated, more going in and less coming out makes logical sense as the fluid being administered is still being redistributed internally to the depleted fluid compartments; in this scenario the fluid rate will need to be increased to achieve rehydration. However, if the patient is adequately hydrated in this situation, where is this fluid going? Why is it not being excreted? Aldridge and O'Dwyer (2013) gave examples of where the fluid may be going, including being lost as an exudate or the patient may have developed oliguric renal failure.
The RVN should be adept at calculating and recalculating fluid administration rates according to changing patient needs. Davis et al (2013) recommended using the following maintenance infusion rates in dogs and cats:
- Dogs: 132 x bodyweight (kg)0.75 which equates to roughly 2–6 ml/kg/hour
- Cats: 80 x bodyweight (kg)0.75 which equates to roughly 2–3 ml/kg/hour.
They recommended calculating fluid deficit by multiplying an animal's bodyweight in kilograms by its percentage dehydration. Aldridge and O'Dwyer (2013) suggested largely similar maintenance fluid rates for cats and dogs: small dogs and cats at 60 ml/kg/day; medium dogs at 50 ml/kg/day; large dogs at 40 ml/kg/day. They recommended calculating fluid deficit by multiplying an animal's bodyweight in kilograms by its percentage dehydration and then by 10 (this last step is based on the estimate that 10 ml/kg of fluid is lost per 1% dehydration). Devey (2007) recommended for paediatric patients a maintenance rate of 2–4 ml/kg/hour, but this again should be assessed according to the patient's clinical signs/physical status, bearing in mind that younger patients have higher fluid requirements.
The RVN must also be able to calculate and administer fluid boluses safely at the direc-tion of the VS. Table 1 shows recommended maximum bolus volumes for dogs and cats. A smaller dose of this total bolus volume, as determined by the VS, will be typically administered over 15 to 60 minutes, after which time the patient is reassessed to determine the efficacy of the fluid resuscitation (Aldridge and O'Dwyer 2013). Repeat boluses can be administered and reassessed, ensuring the total doses in the table are not exceeded. When the desired effect has been achieved and circulating volume has been restored and deficits replaced, the VS will decide on a new fluid rate to maintain the patient, taking into account any ongoing losses. All boluses must be recorded on the patient's records.
Table 1. Recommended maximum bolus volumes
| Dogs | Cats | |
|---|---|---|
| Severe hypovolaemia | 60–90 ml/kg | 40–60 ml/kg |
| Moderate hypovolaemia | 30–50 ml/kg | 10–20 ml/kg |
| Mild hypovolaemia | 10–20 ml/kg | 5–7 ml/kg |
Conclusion
The RVN plays a crucial role in the safe administration of IVFT to veterinary patients, and this article has discussed all facets of the process the RVN must be competent in to ensure optimal patient management, highlighting pitfalls in all areas and how these can be overcome. The accurate assessment and recording of data is essential when administering IVFT, but these data must also be interpreted correctly to identify trends and establish whether improvements are being made in relation to reaching end point goals. The communication between the VS and the RVN needs to be ex-emplary to ensure everybody has the same expectations, everyone is aware of the ongoing infusion management plan, and the RVN feels confident regarding carrying out the actions and instructions of the VS.
KEY POINTS
- Pre-infusion blood sampling and testing produces a lot of useful data for the veterinary surgeon and registered veterinary nurse (RVN) during the planning stages of infusion therapy, to tailor plans according to individual patient needs.
- Safe and effective procurement of blood samples is achievable if the RVN prepares well for the procedure in advance.
- There are numerous veins available for intraveous (IV) catheterisation, however the suitability of each vein and catheter type must be appraised by the RVN having considered what the goals of infusion are and accounting for the patient's individual condition and nature.
- Administration and ongoing management of intravenous fluid therapy (IVFT) needs to be meticulously planned, with specific goal-related reassessment times scheduled.